What did I miss?

It has occurred to me that I haven’t been sharing the layouts I make monthly for Simple Scrapper. Shame on me! Simple Scrapper is such a great resource for memory keepers. Definitely worth checking out if you haven’t already.

Wow, ok, so I’ve failed to share A LOT. Here is what I missed!

In no particular order…

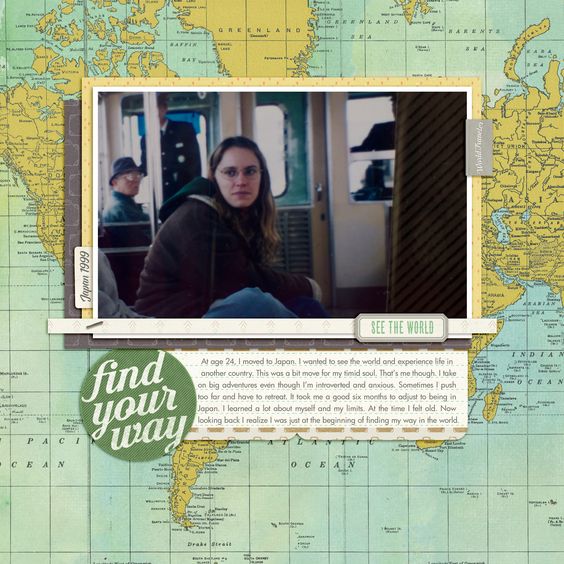
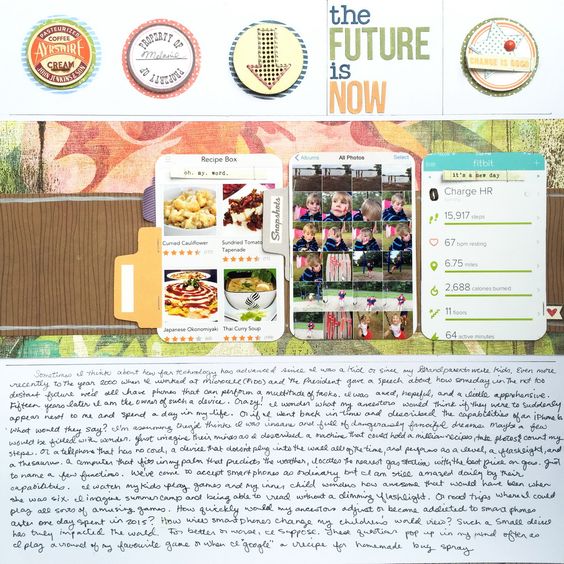
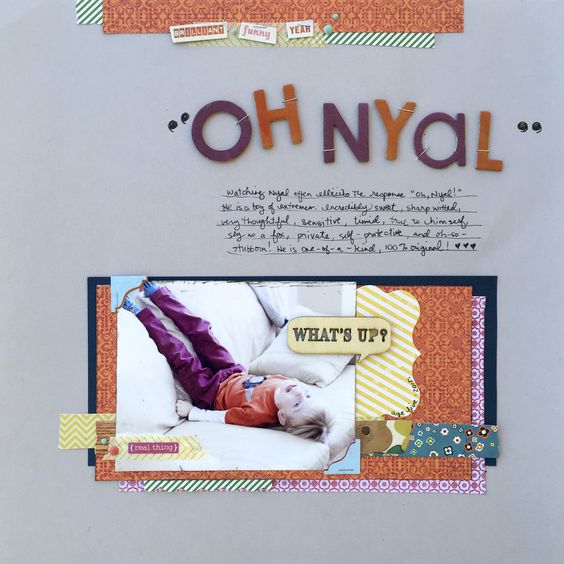
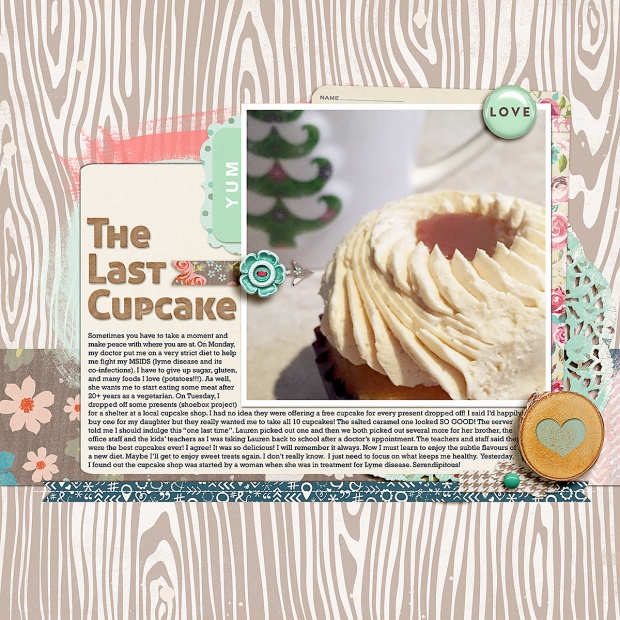
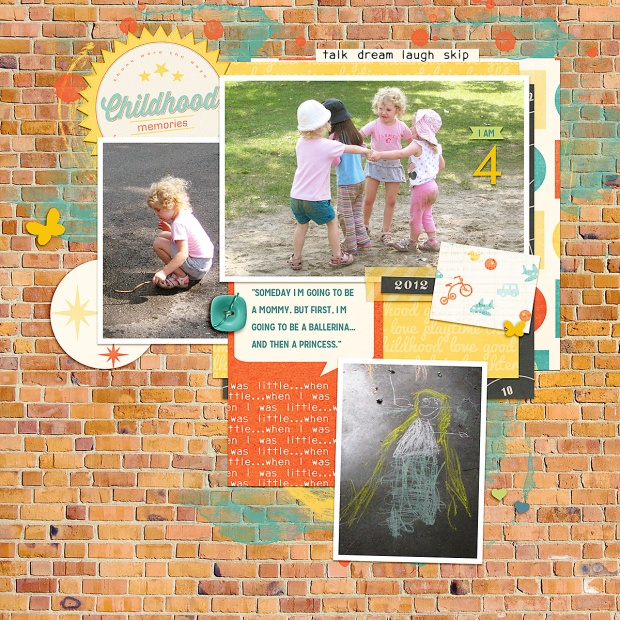
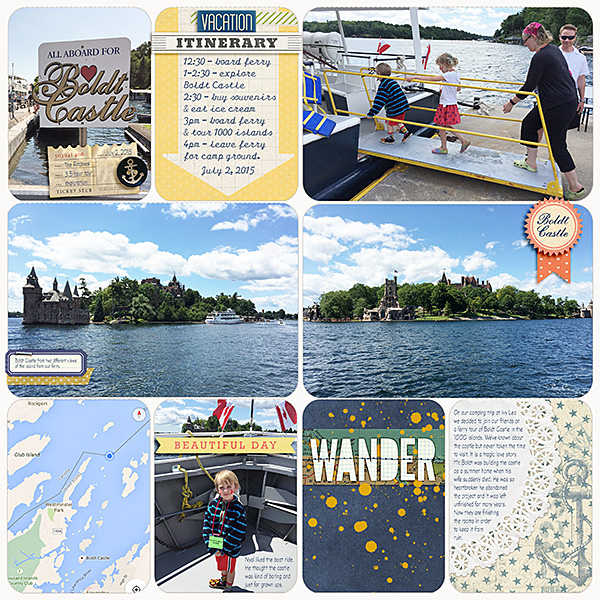
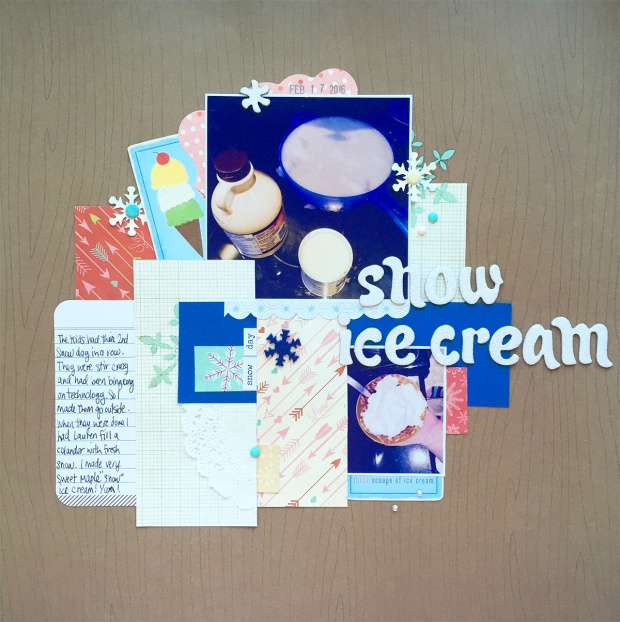
1stday | Melanie Ritchiealberta | Melanie Ritchiecarefree| Melanie Ritchiefindyourway | Melanie Ritchiefuturenow | Melanie Ritchielightshine | Melanie Ritchieohnyal | Melanie Ritchieorangegreen | Melanie Ritchieshowcase | Melanie Ritchiesweetmittens | Melanie Ritchiethink | Melanie Ritchiecupcake | Melanie Ritchiemoment | Melanie Ritchiechildhood | Melanie Ritchieliving the dream | Melanie Ritchiebike | Melanie Ritchielegoland | Melanie Ritchiethe world | Melanie Ritchieto mom | Melanie Ritchieboldt castle | Melanie Ritchiesnow icecream | Melanie Ritchie

Now I must go nap! Peace out!

Oh. My. Word! It’s nearly Halloween! Here’s a treat!

Boo! Did you think you saw a ghost? Or a shadow of my former self? I am alive. My blog is rather dusty. Summer happened and then the leaves fell off the trees, and now I’m here.

This past week, I started Lilla Roger’s “Make Art That Sells: Part B” e-course. So for five weeks, my head will be in a creative fog, whirlwind, cloud? I don’t know. Something where rainbows and unicorns swirl around my head while I bump into walls and unintentionally ignore people who are trying to talk to me. So, no offence in advance, peeps.

As for Halloween, I put a kit in my Pixels & Company shop and it will be on for half price until, uh, Halloween.

Trick or Treat Full Kit | Melanie Ritchie

Trick or Treat Elements | Melanie Ritchie

Trick or Treat Papers | Melanie Ritchie

Trick or Treat Papers | Melanie Ritchie


Trick or Treat Alpha | Melanie Ritchie

Trick or Treat Alpha Tags | Melanie Ritchie

Trick or Treat Freebie | Melanie Ritchie

To download the freebie, click on the photo and follow the link to my shop. Add the item to your cart and you will be able to download it instantly.

Have a fabulous Friday and an even better weekend!

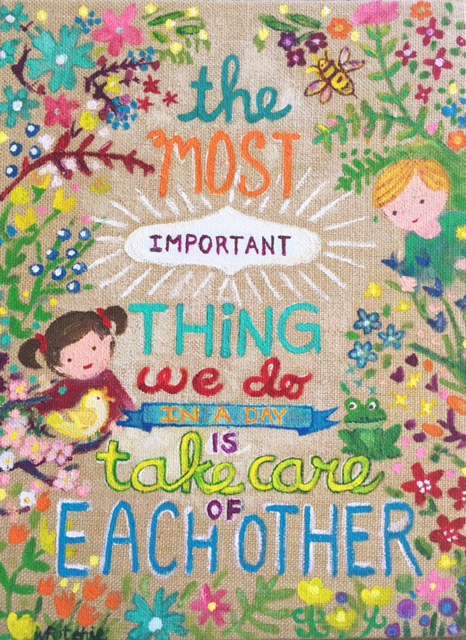
The most important thing we do in a day is take care of each other.

While I was busy galavanting, eating, and entertaining, life outside the home apparently went on without me. Who knew?

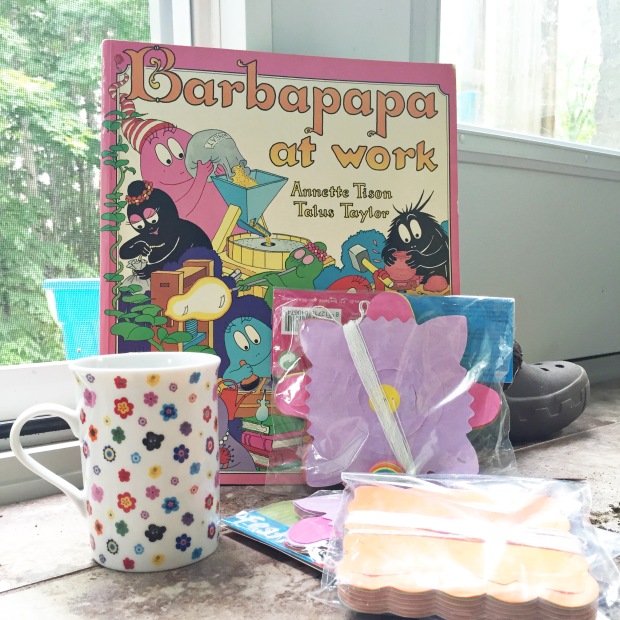
I’ve had a busy few weeks. I had the pleasure of babysitting a sweet little baby for a week (well, a few days really). I got an awesome thank you gift for helping out. The mom knows I’m a big fan of Barbapapa and she spoiled me with a vintage book and a flowery mug, and some party streamers from Amsterdam. See those little Barbapapa faces in the flowers on the mug? Oh, Happy day!

Barbapapa Gift | Melanie Ritchie

Then my best friend from high school came for a visit. We had some really good eats and had a long overdue chance to just hang out and catch up on our lives. We also watched “Reality Bites” which was our favourite movie to watch together 20 years ago. I can’t believe how quickly time passes. I was surprised to see I still like the movie and my opinion of the characters hasn’t changed much. I had to laugh about us though. Back in the mid-90s we watched the movie in the basement of my childhood home. Or maybe in her home. We drank Coke and ate Little Caesars Pizza or a bag of chips. Now we’re both Moms of young kids sitting in my home commenting on how delicious the fancy cheese and baguettes taste. Subtle changes! Ha!

Sunset in Ottawa | Melanie Ritchie

Our first night finished with a lovely sunset in downtown Ottawa.

Drinks | Melanie Ritchie

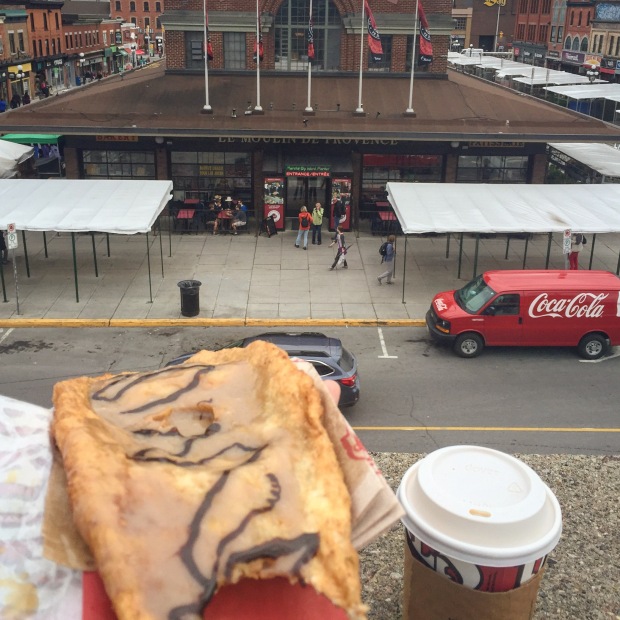
We had a really yummy lunch at Burrito Burracho in the Byward Market. I highly recommend the Tortilla soup. Then we wandered a bit before treating ourselves to a Maple Beavertail before heading home. YUM YUM!

IMG_2919

It was just so good to see her! I was sad to see her go. She gave me a very pretty bracelet from Alex and Ani as a hostess gift. It has a little pineapple charm. Pineapples are a symbol of friendship and hospitality. How perfect is that? Plus, I love pineapples.

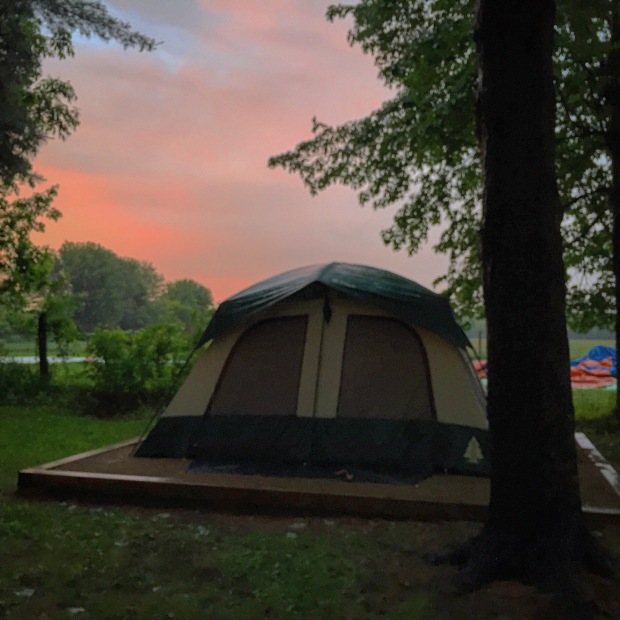
The day after my friend left, my family and I went camping with friends at a very kids friendly KOA campground. Despite the initial rain and the plummeting temperature at night, we had a great time. Only a few weeks until our next camping trip!

After the rain | Melanie Ritchie

Upon return from camping, we had a visit from my husband’s Aunt. She is awesome. That’s all that needs to be said about that.

Then I spent the next day preparing for my very first Thirty-One gifts experience. I set up a table at the kids’ school’s Fun Night. I’m selling Thirty-One products to fundraise for the school’s Kindergarten playground project. There seemed to be a lot of interest in the products but the best part was getting to talk to other parents. Normally at events I’m busy with the kids and I have no particular reason to start up conversations with strangers. This was a great way for me to be more social.

Then the next day my parents came to town for my daughter’s Highland dance recital. It was a really good show! I also enjoyed shopping for plants with my mom and my daughter. I had trouble limiting myself to a few carefully chosen perennials. My mom bought a few plants for me  too as a very early birthday gift. Yay!

Plants | Melanie Ritchie

On the weekend, I had various things to do but managed to work on something that has been brewing in my head for awhile. I greatly admire the Junior Kindergarten teacher that taught my daughter two years ago and is finishing up teaching my son this year. She’s just a lovely person with a very gentle heart. She is exactly the type of person I hoped would teach my kids. She inspires the kids with exploring nature, science, and art. She encourages them to think critically. Most of all, I love that she teaches compassion. As a thank you I wanted to create a painting for her. I chose to illustrate her class motto which I think should be everyone’s motto.

The most important thing we do in a day is take care of each other.

I was thrilled the painting came together so quickly. I’m often disappointed and frustrated with painting. Things don’t always turn out the way I envision them. This one just made me very happy from start to finish. Maybe because I like the motto so much? So, today I took it to the school at midday and surprised her with it. I think it is fair to say, she likes it. Which makes me very happy! Although, I am sad that I won’t have a reason to talk with the teacher anymore.

Taking Care Artwork by Melanie Ritchie

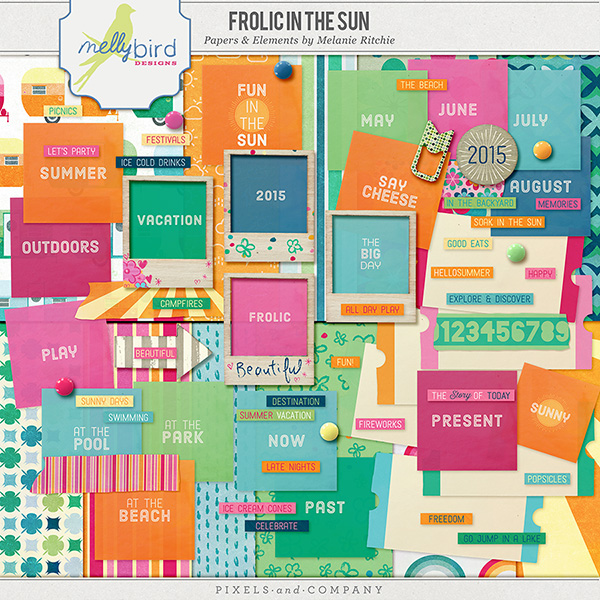
I came home and sat down to write this post and remembered today is the day my newest designs are released for sale at Pixels and Company. I can’t believe I forgot! I’ve been so busy! I’ll show them to you now. Tomorrow I will sit down at my computer and get started on all the design ideas that have been gathering in my head the past few weeks.

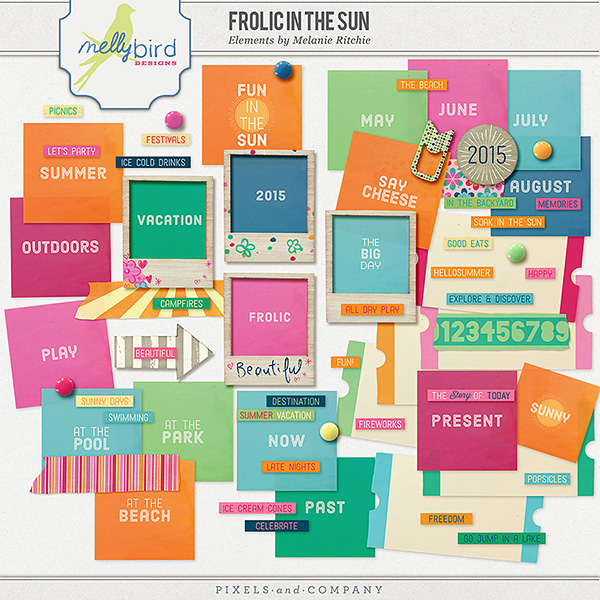
Frolic Full Kit | Melanie Ritchie

Weather Cards | Melanie Ritchie

Frolic Elements | Melanie Ritchie

Frolic Papers | Melanie Ritchie

Frolic Journal Cards | Melanie Ritchie

Frolic Cupcake Labels | Melanie Ritchie

Have a relaxing Monday evening!

In Good Company! My return to Digiland!

I am so pleased to announce that I’ve just set up shop at Pixels & Company as a designer. I’ll be designing alongside of Celeste Knight, Deena Rutter, Gennifer Bursett, Jen Allyson, Meredith Cardall, Robin Meierotto, and Shirley Polk. That is a pretty talented and inspiring roster of artists.

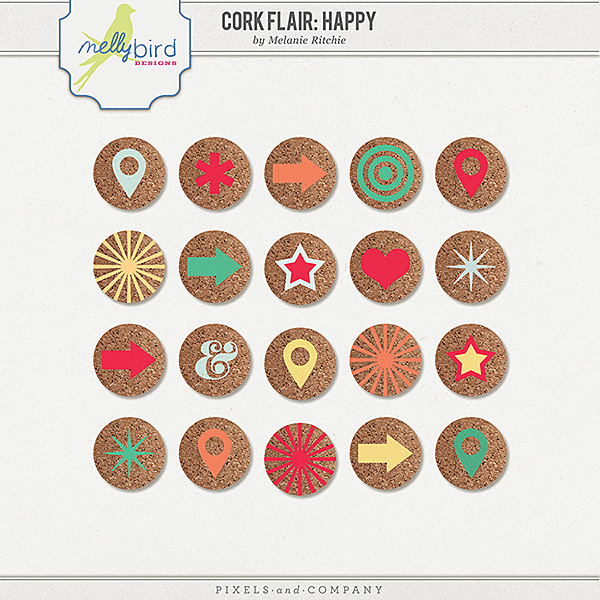
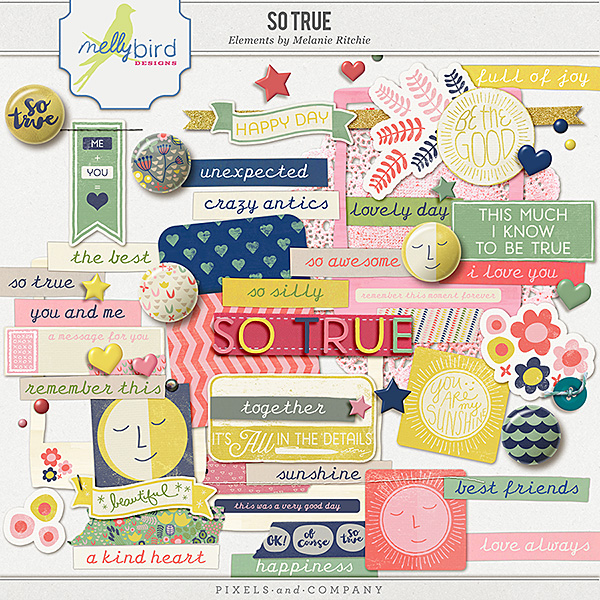
My new products will be released twice a month. This week I released a full kit (So True), a journal card pack (So True) and an element pack (Cork Flairs: Happy). They are currently at least 30% off!

Cork Flair: Happy by Melanie Ritchie

So True | Elements by Melanie Ritchie
So True | Full Kit by Melanie Ritchie

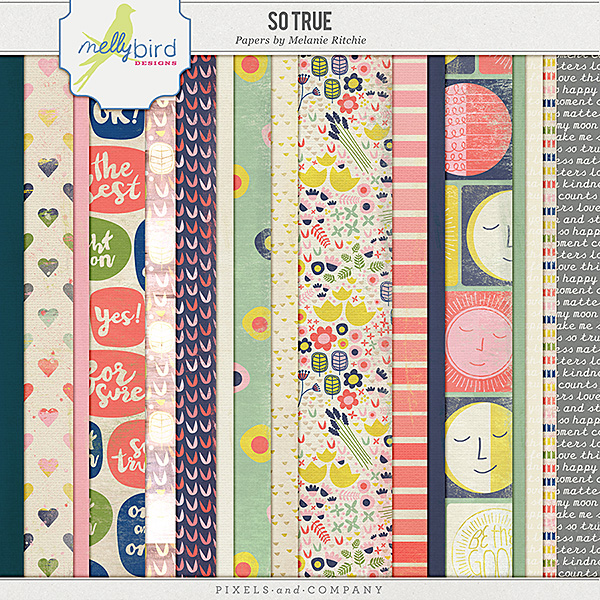
So True | Papers by Melanie Ritchie

So True | Journal Cards by Melanie Ritchie

Here are a couple layouts from some P&Co Creative Team talent:

Happy Day by Maribel Rivas

by Maribel Rivas

This Is My Crew by Kate Christensen

by Kate Christensen

Where was I?

Oh right, squirrels. I spent a good five minutes trying to remember what I wanted to write about. Happy Little Squirrels. Maybe a few other things too.

On Tuesday the kids and I went to the park briefly on our walk home. I’d just picked up our mail and I had a package with lovely calligraphic writing for the address. It was from my lovely friend Nancie Rowe Janitz. She sent me Happy Mail!!!!

Happy Mail | Melanie Ritchie

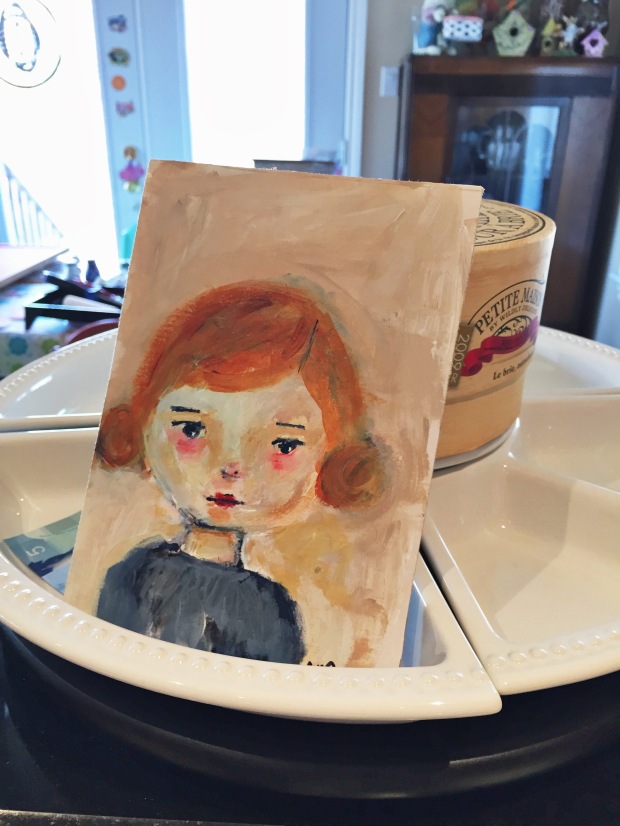
While the kids played I opened it and was over the moon excited when I saw the goodies inside. She had sent me a painting! I am now the proud owner of an original Nancie Rowe Janitz piece of art! She had posted a photo of it on Facebook a couple months ago and I had admired it then. Such a lovely and enchanting girl (I’m referring to the girl in the painting but it would apply to Nancie as well)!

Art by Nancie Rowe Janitz | Melanie Ritchie

Also in the package was Yogi tea. I LOVE Yogi Tea. I had mentioned to Nancie that I’m not able to get certain flavours of the tea in Canada (boo hoo) and she thoughtfully took note and sent me some. Isn’t that incredibly thoughtful? I think so. The tea came at such a good time since I haven’t been feeling well lately. By the way, the flavours are: Honey Lavender Stress Relief and Soothing Caramel Bedtime. YUMMY!

Yogi Tea Bag Message | Melanie Ritchie

The above photo is my first cup I had right after we returned from the park. It was the Honey Lavender Stress Relief tea. I feared the Soothing Caramel Bedtime tea would put me to sleep before I even made supper. So I had that later (see below). I love the tea but I also love the inspiring little notes on each tea bag.

Yogi Tea Bag Message | Melanie Ritchie

You are probably now very happy for me but wondering what this has to do with squirrels. Well, as my children were playing and I was hugging my care package, a squirrel was scurrying behind my park bench. I looked over and gasped. The squirrel had some squirming creature in its mouth. My first thought was that it had a mouse and then I came to my senses. Squirrels don’t eat mice. It must be a squirrel baby. Yes, that’s it. This squirrel was carrying its baby. It ran over and up a tree and down inside where her next must be hidden. Then she came out and ran across the park. Soon she ran back with another baby in her mouth. She did this circuit several times. She must have a pretty large litter of babies. Maybe six or so. I’m so curious about why she was moving her babies. Did she go out for a jaunt and go into labour? Or was she moving the babies from a pre-existing nest to a new one? How nerve wracking it must have been for her to have to leave babies in one place while she transported them one at a time. Once I got home, I looked up videos of baby squirrels and confirmed that was what I saw. Yup, it was.

Ok, so I covered the squirrels and the Happy Mail. Phew! Then I guess my mission is accomplished and my day is done. Goodnight friends!

Ice Breakers and frozen fingers

Oh dear me, the draft of my post disappeared! I’ll paraphrase what I think I said because a few days have passed and the memory isn’t as fresh. I’m not feeling so poetic tonight.

Last weekend, we were treated to a lot of snow and then it turned to frozen rain. The return to school coincided with treacherous road conditions. Our driveway and street were an ice rink. It was a lovely Winter Wonderland otherwise. When the kids returned from school, the sky was such a pretty colour and shimmering down on the ice covered snow.

The kids wanted to walk on the snow at the park. The idea of being able to walk on snow was quite novel to them. They were fascinated they were able to walk without sinking. It reminded me of when I was a kid walking home from school. I would take short cuts through the yards of three schools. Often the snow would be up to my knees. Out of boredom and an attempt to distract myself from the cold, I’d make it bit of a contest to see how many steps I could take without breaking through the snow. I was very light footed back then.

Then they discovered they could jump and crack the snow. Even more exciting than walking on snow, was smashing through the crusty layer of ice. Luckily, I had dashed home to retrieve my camera when I saw that the sky was so lovely. So I was prepared with camera in hand.

Then my daughter realized how cold she was feeling and we quickly hurried home. Which was good timing as my fingers were quite numb with cold from taking photos.

Darn, I wish I hadn’t lost my original post. It was much better. Ha!

So, here are some of the photos I took and a layout I made with them using supplies from the Pixels & Company Designers.

mr_jan_winter6 mr_jan_winter5 mr_jan_winter4 mr_jan_winter3 mr_jan_winter1 mr_jan_winter2 Photo by Melanie Ritchie drutter-d365-winter2015-lores

Keep warm and enjoy your Sunday!

Winner of the Discover December Class Giveaway!

Eeks! I forgot to pick a winner last night! Better late than never, right?

Without further ado, the winner of Kelly Sill’s Discover December holiday class at Scrapaneers is…

… Susan!

My holidays will be special this year because I am going to Disneyworld with my 6 & 4 year old nieces! Can’t wait to see what happens!

Thanks for participating!

Discover December Class Giveaway!

How appropriate snow has arrived as I write this blog post. My daughter ran up to me and started singing and dancing about how winter has arrived and we can now play Christmas music. I guess that is what stirs her Christmas spirit.

I’m trying to think what gets me all jolly and festive. Maybe smelling chimney smoke while walking in the snow? It was the best part of walking home from school when I was a kid. Now it is a rare thing as very few working fireplaces remain. What else? Probably looking at my Christmas Scrapbook supplies. Yes, everything always comes back to Scrapbooking!

I think all of us “scrappers” can admit, we like to anticipate how we will capture the holiday magic in our albums. We start off with high hopes and many of us probably end up overwhelmed with half finished albums. Am I right?

Well, I have two things that might be helpful to you:

1. Sign up for Simple Scrapper’s FREE Seasonal event “Holiday Focus“. Ideas, planning, peer support, and more to help you document AND enjoy your holiday season!

and (drumroll, please)…

2. I’m hosting a giveaway to Kelly Sill’s Discover December holiday class at Scrapaneers. I’m particularly excited about this one as I had the pleasure and honour of designing the class kit. Plus, there are additional supplies designed by Karla Dudley and Taylormade Designs. How awesome is that?

The class was created with busy holiday schedules in mind. Kelly offers time-saving solutions to help you not only start but FINISH your holiday album.


Wouldn’t you like to be take part in the fun? The first is as simple as signing up! For the latter, I am offering a giveaway for one person to get the class for FREE! Please leave a comment telling me how you plan to make your holidays special this year. A winner will be randomly selected on Tuesday, November 18th after 9pm (EST).

Can’t wait to see your comments! Happy Sunday!

Two new layouts and a Happy National Scrapbook Day!

Happy National Scrapbooking Day everyone! I’m convalescing on the sofa bed in my craft room on this gloomy day. My mood cannot be dimmed as today is a happy day! I would like to be creating layouts but I have just enough energy to do a little writing and take frequent naps. I had my wisdom teeth yanked out 48 hours ago so priority #1 is getting some R&R.

In April, I worked on decluttering and organizing the house and my craft room. The Easter Bunny came for a visit and left the kids lots of treats. I had the pleasure of taking a solo trip to Nova Scotia to visit my best friend. It was JUST what I needed! Now it is May and time for me to share my layouts.

Both layouts were made with a template that comes with premium membership at the Simple Scrapper. I am linking up this post with my layout to the Simple Scrapper blog for the Community Show & Tell. Check out all the other layouts and add your own layout or creative project for everyone to see. For details on linking up, see the Simple Scrapper blog.

1. Easter Bunnies: Oooh, I had fun with this one. I finally succeeded in stitching on a layout with a sewing machine (the circles under “wonderful”). Huge accomplishment for me. Check that off my bucket list! I bought the photo booth Easter props at Target for $5. I’m loving that retro vintage bunny chipboard sticker.

ritchie_may14-s2lores


2. You & Me:  The goal was to create a layout telling the story of how I met my best friend. I ended up sharing more of a timeline on the times and places we’ve been together. I made the layout the week before I got to visit her in Nova Scotia! It had been 3 years since we’d last visited each other. Such a good time! I love putting lots of journaling on a page. I hope to add more journaling to my pages in the future.

ritchie_may14-story2lores

Again, I’d like to remind everyone that I’ve been asked to teach on a scrapbooking cruise (Pure Magic Croppers) for next winter. Do you want to join me, Feb 22-Mar 1 2015 on a week long cruise to Florida and the Bahamas?  I’ll be teaching a class on each of the three “at sea” days. If you would like more details, check out the Pure Magic Vacations page on facebook.

Huzzah! Two new layouts and a cruise!

March has flown by. Well, more like roared… lion-like. ROAR! Snow. Snow. Snow. Freezing. Snow.

In more joyous news, birthday parties were had. Relatives visited. Moods lifted. Clutter decluttered. Stuff happened.

I also found time to scrapbook. Or as I like to say, “Craft happened”.

Before I get to showing my two layouts, I wanted to also share something interesting that popped up on my calendar. I’ve been asked to teach on a scrapbooking cruise (Pure Magic Croppers) for next winter. Do you want to join me, Feb 22-Mar 1 2015 on a week long cruise to Florida and the Bahamas?  I’ll be teaching a class on each of the three “at sea” days. If you would like more details, check out the Pure Magic Vacations page on facebook.

Now about those layouts. Both layouts were made with a template that comes with premium membership at the Simple Scrapper. I am linking up this post with my layout to the Simple Scrapper blog for the Community Show & Tell. Check out all the other layouts and add your own layout or creative project for everyone to see. For details on linking up, see the Simple Scrapper blog.

1. My plan was to make a layout showing something currently in my home that honours my past. I have a great attachment to my maternal Grandma and I keep several items I inherited in my kitchen.  My life has changed so much in the past decade and I live hours away from my hometown. Surrounding myself with these mementos connects me to the people and places that are no longer in my life.

ritchie_apr14-s3-lores

2.  I am slowly documenting my Disney vacation from last November. The entire trip is in a D-ring album with pocket pages. The highlights of the trip will become 12×12 pages. This layout is a small moment that might not seem worthy of a whole layout. Yet, to me, it is exactly why I wanted to take my kids to Disney World. The place specializes in magic. As a kid, I remember that sense of wonder and amazement at water fountains and colourful lights. I think I was as excited as my daughter to see these stones twinkle as we were leaving Epcot at twilight.

ritchie_apr14-story10-lores

Happy Spring! May it bring lots of flowers and happy moments!

The Loss of Normal

“Grief is the loss of normal.” ― Brené Brown

When I heard these words in an online class by Brené Brown, I immediately thought of a moment in my life many years ago. Well, more than a thought really. It was like someone slapped me back into the body of the 17 year old girl sitting in a hospital room watching her beloved Grandfather die. I can still not think of that moment without my eyes welling up and a choking feeling in my chest.

Until that point of my life, I hadn’t experienced the loss of a close relative. I had lost pets and that was painful. I hadn’t lost a person. Someone who was very hard to live without. I loved my Grandpa very much. We lived a five minute drive from my grandparents’ home. I spent a lot of time there and he was a fixture in my life.

When he became ill I could hardly believe it. When the illness was pronounced terminal I was in a state of panic and probably denial. When he died I was broken.

It was the January 2nd, the day I spent by his bedside along with family: grown children, teenage grandchildren, and wife. His siblings and other family and close friends wandered in and out of the room all day paying their last respects. I remember having a hard time making eye contact with anyone else. I think I wasn’t alone in that. If we looked at each other, we might have to admit what was happening was real and permanent. I used all my will to not cry. Only possible by avoiding connection. The room felt like it was buzzing with electricity. To me, that was perfectly how “the loss of normal” feels. All I could do to hold on to what little reality I had left, was listen to the rattling breath of my Grandpa. He was struggling. I think I left around midnight. He died early morning.

When I received the journal prompts (story starters) and theme for the month at Simple Scrapper, I knew I wanted to tell this story. I don’t have a lot of photos of my Grandpa in those last years. I found one that had belonged to my Grandma, which was taken at his retirement party several months before he died. It wasn’t the greatest photo but it captures the Grandpa I knew and loved. I scanned it and edited it with Rad Lab to make it less stark on my layout. I also wanted it a bit dreamlike.

Here is the scanned photo:

grandpa

Here is the layout with the edited photo:

ritchie_mar14-story10_Lores

It was an emotional layout and I think I had a bit of trouble focusing. I made some errors trying to place the title, simply because grief lingers. Mistakes aside, I will cherish this layout.

My layout was made with a template and inspired by a journal prompt that comes with premium membership at the Simple Scrapper. I am linking up this post with my layout to the Simple Scrapper blog for the Community Show & Tell. Check out all the other layouts and add your own layout or creative project for everyone to see. For details on linking up, see the Simple Scrapper blog.

Cuckoo for Cuckoo Clocks!

It’s Saturday afternoon. The time of afternoon where I want to close my eyes and curl up like a cat on a warm blanket. My daughter is tap dancing on a piece of fibre board. My son is building his marble maze. My husband is on the phone with his Mom. There’s a horse drawn hay wagon, four white minivans, and a school bus across the street for some reason I don’t quite understand. I’m about to work on a scrapbook layout for a guest blog post coming out next week somewhere very special.

This past week I doodled, sketched, and panicked over cuckoo clocks. I signed up for Lilla Roger’s Make Art That Sells Assignment Bootcamp. A friend was going to take it and I couldn’t resist joining her. What a talented group of artists! Holy Moly! I am ever so humbled and scared out of my mind. I am ever so brave, because as much as the negative thoughts (you’re not good enough, you don’t know how to do that yet, why are you even bothering) swirl in my mind, I’m taking the class anyway.

“We don’t make mistakes, just happy little accidents.” ― Bob Ross

I decided to paint one of my sketches with watercolour. I can’t remember the last time I did a watercolour painting. I didn’t finish it yet because I’m tired and have other things to do, but it was fun practicing.

cuckoowater_web

As well as doodling all week, my kids and I suffered annoyingly pesky head colds. To make things happier, we ate a few sweet treats and I captured a couple lunch time photos. (Edited with RadLab)

nyalfeb6bw-copy

laurenfeb61-lores

Now don’t forget to enter my giveaway for Jennifer Wilson’s  Before Your Story at Big Picture Classes. Leave a comment on this post for your chance to win.

February Simple Scrapper Community Show & Tell…

Happy Monday! I’m here to show you a couple layouts I made last month.

Both layouts were made with a template that comes with premium membership at the Simple Scrapper. I am linking up this post with my layout to the Simple Scrapper blog for the Community Show & Tell. Check out all the other layouts and add your own layout or creative project for everyone to see. For details on linking up, see the Simple Scrapper blog.

Also, DO NOT forget to check out this post where you can still leave a comment to win a spot in Jennifer Wilson’s Before Your Story at Big Picture Classes.

1. This layout also used a story starter prompt involving the things I’m really into right now. I decided to do it digitally. I even threw in a screen capture of an online purchase.

apr12-single3_mr_ss3-lores

2. This layout is actually a 6×6 as I wanted to fit it in a 12×12 pocket page that has four 6×6 pockets. I was prompted by an art journaling project where I take a photo from my childhood where I feel the most “me”.

ritchie_feb14_s5lores

I have lots going on in February so I’d better get a good night’s sleep so I can blog all about everything in the coming weeks. Have a lovely week! Night night!

Join in the fun at the 34 Things Blog Party! Also, a Giveaway!

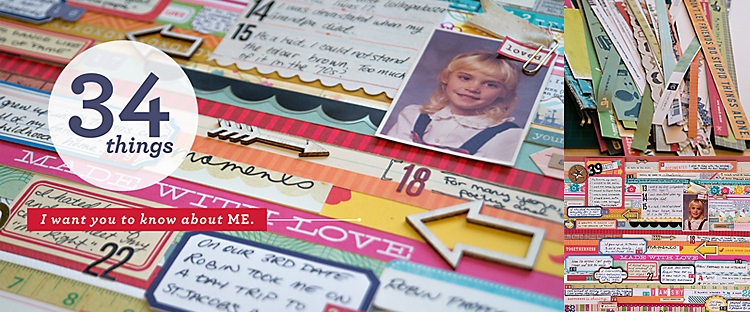
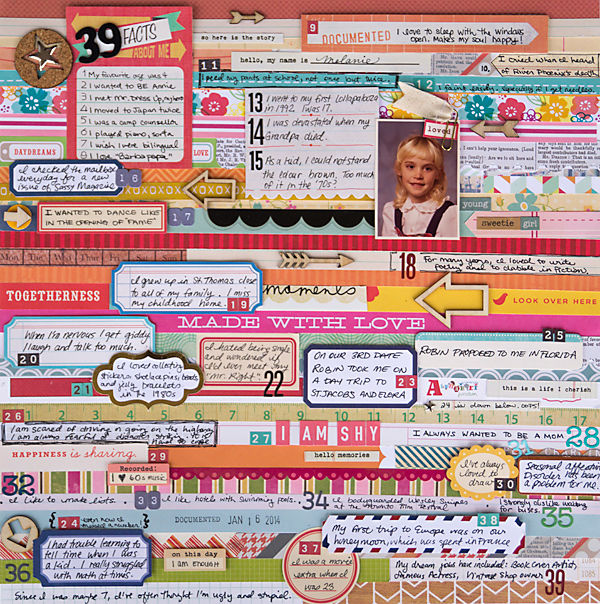
Yesterday I was inspired by the Simple Scrapper’s blog post “34 Things I Want You to Know About Me“. Jennifer Wilson is sharing a portion of her list every Wednesday for the next month. She’s invited others to participate as well. So I rang the doorbell and she let me into the party.

I created my own list and added a few extra facts for good measure. I spread out my list across a 12×12 layout.

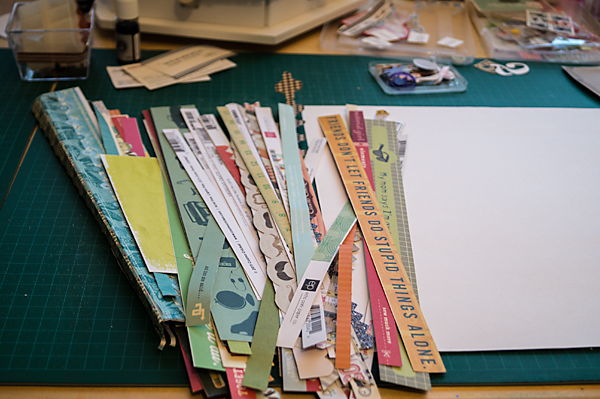
For over a year now I’ve been collecting the bottom strips of my scrapbook paper. You know, the ones that give the company and collection name? Sometimes they’re super cute and I can’t bring myself to throw them out. I challenged myself to use them in a layout.

mr_39things3

I glued the strips down on a piece of plain white 12×12 paper. To cover up company/product information, I either covered  portions of the strips with the tags and stickers, or cut two strips into pieces and placed together in a line. Sometimes I purposely exposed the paper/collection names written on the strips, to enhance the layout (ex. Togetherness, Made with Love, Look over here).

Additionally, I used some wooden arrows, alphabet stickers, and a few embellishments. Some of my list is written right onto the paper strips. For the rest, I used a number of journal tags and stickers.  I used foam pop up dots behind the labels to give a bit of dimension to the layout. It’s hard to make a layout like this cohesive as there is just so much to visually take in. The arrows were necessary to help guide the eye around the page.

I have a plan to elaborate on the details of each item, in separate layouts. This layout will end up being a table of contents for that album.

Here is my layout and below it is my list:

mr_39things2

My list of “39 facts about me” (because 34 Things just wasn’t enough):

  1. My favourite age was 4.
  2. I wanted to BE Annie.
  3. I met Mr. Dressup, my hero.
  4. I moved to Japan twice.
  5. I was a camp counsellor.
  6. I played piano, sorta.
  7. I wish I were bilingual.
  8. I love “Barbapapa”.
  9. I love to sleep with the windows open. Makes my soul happy!
  10. I cried when I heard of River Phoenix’s death.
  11. I peed my pants at school, not once but twice.
  12. I faint easily, especially if I get needles.
  13. I went to my first Lollapalooza in 1992. I was 17.
  14. I was devastated when my Grandpa died.
  15. As a kid, I could not stand the colour brown. Too much of it in the ’70s?
  16. I checked the mailbox everyday for a new issue of “Sassy” Magazine.
  17. I wanted to dance like in the opening of “Fame”.
  18. For many years, I loved to write poetry and dabble in fiction.
  19. I grew up in St.Thomas, close to all of my family. I miss my childhood home.
  20. When I’m nervous I get giddy. I laugh and talk too much.
  21. I loved collecting stickers, shoelace pins, beads, and jelly bracelets in the 1980s.
  22. I hated being single and wondered if I’d ever meet my “Mr.Right”.
  23. On our 3rd date, Robin took me on a day trip to St. Jacob’s and Elora.
  24. I had trouble learning to tell time when I was a kid. I really struggled with math at times.
  25. Robin proposed to me in Florida.
  26. I am scared of driving or going on the highway. I am always fearful of disaster striking. It is hard to cope.
  27. I am shy.
  28. I always wanted to be a Mom.
  29. I ♥ 60s music.
  30. I’ve always loved to draw.
  31. Seasonal Affective Disorder has been a problem for me.
  32. I like to make lists.
  33. I like hotels with swimming pools.
  34. I body guarded Wesley Snipes at the Toronto Film Festival.
  35. I strongly dislike waiting for buses.
  36. Since I was maybe 7, I’ve often thought I’m ugly and stupid.
  37. I was a movie extra when I was 23.
  38. My first trip to Europe was on our honeymoon, which was spent in France.
  39. My dream jobs have included: Book Cover Artist, Famous Actress, Vintage Shop Owner.

Oh, and how about a giveaway?

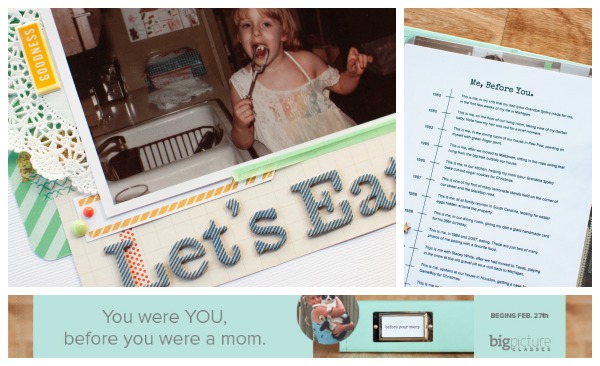
How would you like a spot in Before Your Story at Big Picture Classes? The class is A Simple Approach to Autobiographical Scrapbooking, from Birth to Adulthood. The class has a value of $45 and starts February 27th. ENTER TO WIN by leaving a COMMENT below telling me a story you’d like to document from your own childhood. I’ll pick a winner on February 14th.

BPC BYS image 3

About the Class

There are milestone events in life, such as marriage and motherhood, that divide us permanently into a “before” and an “after.” It’s easy to become so immersed in the after—the glorious here and now—that our “befores” rarely appear in our scrapbooks.

In this 6-week workshop with Jennifer Wilson of simplescrapper.com, you’ll have all the guidance you need to tell your growing-up story in one gorgeous 12″ x 12″ pocket album. Her class combines the ease of slipping photos and journaling cards into photo sleeves with the brilliance of Stacy Julian’s “Library of Memories” scrapbooking categories.

Jennifer excels at making big goals reachable and overwhelming projects finish-able, with her step-by-step processes and detailed planning worksheets. You’ll complete a simple, streamlined album that will help your spouse or partner catch up on the years leading up to the moment you met. Or, it’s the perfect answer to that age-old question, “Mom, what were you like when you were my age?”


This is going to take awhile.

In November, my family went to Disney World. It was the first visit for my kids. My husband and I hadn’t been there since he proposed eight years ago. One of my goals for 2014 is to complete the album of our vacation. I’m using pocket pages in a 12×12 D-ring album. Between pocket pages filled with 4×6 photos and journal cards, will be full page 12×12 layouts.

For the two layouts I’m sharing today, I used templates and a story starter journal prompt from the premium Simple Scrapper membership.

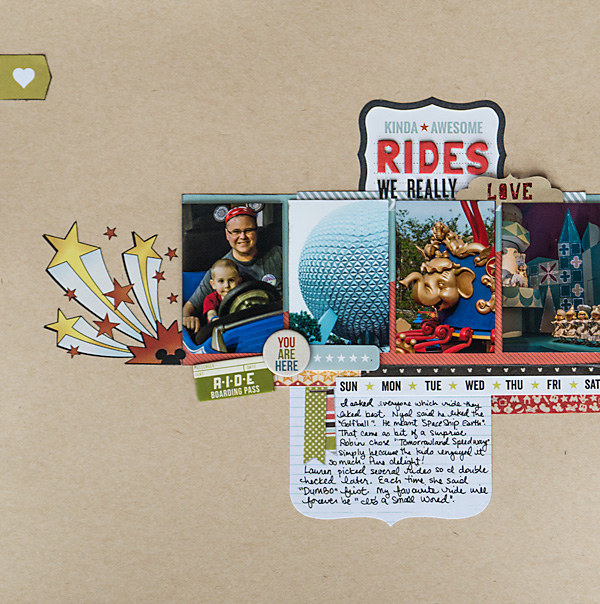
1. For this layout, I was inspired by a journal prompt listing all my favourite things. I put my own twist on it and instead wrote about the favourite ride of each family member. I had intended to use a list and number the photos with the items on the list. In the end, I wrote a paragraph with a more in-depth description about the rides and didn’t number the photos.

I used traditional paper supplies.

ritchie_jan14-story4_lores

2. For this layout, I used all digital supplies. I had this cute journal card I wanted to use but the sentiment on it wasn’t working for me. So I used the clone tool to “erase” the words and then added the word “destination” in a font and colour of my choosing.

For the title “holiday”, I used the arsenale white font. I added a drop shadow and then warped it so it would look like a cut file. I put a stitch through the middle. I think it looks like paper!

ritchie_jan14_s1-lores

Digital Supplies used:
All Mapped Out | Elements by Dawn by Design
Walt’s Park: Holiday Kit by Scotty Girl Design
Penny kit by creashens
Wonderland | Journal Cards by Sabrina’s Creations

To see more blog posts sharing in the Simple Scrapper community show-and-tell, click here!

The Premium Membership at Simple Scrapper provides skills and shortcuts to help you simplify and find more meaning in your memory keeping.


December Simple Scrapper Community Show & Tell…

Oooh, I have so much to scrapbook! I went to Disney World last month and since I returned I’ve been racing to catch up on emails, projects, scrapbook layouts, and getting ready for the holidays.

Here is one of my layouts made with a template that comes with premium membership at the Simple Scrapper. I am linking up this post with my layout to the Simple Scrapper blog for the Community Show & Tell. Check out all the other layouts and add your own layout or creative project for everyone to see. For details on linking up, see the Simple Scrapper blog.

epcotprincess-lowres

Sketch template from Simple Scrapper’s Premium Membership

Oh yes I did!

I put my design hiatus on hiatus so that I could have the privilege of collaborating with Nancie Rowe Janitz on a Christmas themed digital kit. So without further ado, here is our mega huge “Silent Night” on sale today in Nancie’s shop at JessicaSprague.com. It is available separated into patterned papers, solids and elements OR you can buy the complete collection.

Why Silent Night? My three reasons: It is my favourite Christmas carol; For nearly four years I’ve sung it to my son as a lullaby… works like magic; when I was a kid I loved staring up into night sky during cold, snowy December nights when the stars would shimmer like diamonds. Few things have ever made me feel more complete. To me, Silent Night holds the meaning of Christmas… in the midst of chaos and turmoil, beautiful things can be born in the stillness of the moment. My wish is for everyone to feel peace in their lives this holiday season.

nrjmr-silentnight-patterns nrjmr-silentnight-solids nrjmr-silentnight-elements

To make things extra special, here is a free quickpage (12×12). I thought it would make a great cover page for a Christmas album. Hop on over to Nancie’s blog as she’ll be giving away some word art.

mr_silentnight_quickpage-lowres

Click on image or HERE to download.

Hope you like it!

My Scrapbooking therapy and a Giveaway!!!

I was a guest blogger this week at Simple Scrapper. I shared my thoughts on scrapbooking difficult topics and how I use my favourite hobby to make peace with my problems. More or less.

Not all my scrapbook layouts are about the cheerful bliss in my life. Here is a layout I did a couple years ago about a challenging day. Click here to read my post at Simple Scrapper.

sts_mm26-160

Now about that giveaway. I am giving away a spot in the 12 Days of Christmas: December Duos class at Big Picture Classes. The class runs from December 12-25th. The class is described as:

The “December Duos” concept is easy, stress-free, and inspiring. Every day for the twelve days leading up to Christmas Day, two of our twelve instructors will share a scrapbook layout, video message, and a page prompt in the form of a duo (“warm & cold,” “give & receive,” “near & far”). That’s a total of two-dozen inspiring ideas!

You can follow the instructor’s lead or march in your own direction as you snap your photos for the day. Then, after printing our fabulously free journaling cards and title cards, you’ll either slip the cards and your photos into a Project Life mini album from American Crafts or use them on a traditional (or digital) scrapbook page.

12 Days of Christmas: December Duos makes it easy to capture all of your most important holiday moments—in a festive new format—while keeping up with all the parties, presents, and pageants that make the holiday season magical.

Learn more and register here

Please leave a comment below sharing your favourite holiday tradition and you’ll be entered to win a spot in the class. I’ll close the comments on November 30th at 9pm EST.

BPC DD collage 1

I’m dreaming of Disney

I thought I was a fan of Disney World. Once I was past the age of 10, I was never really into Disney movies or culture. I just liked the theme parks. When I was three I went to Magic Kingdom for the first time. At age 11, I went to Epcot and Magic Kingdom. At 15, I went to MGM. I was always very nostalgic about those trips.

My husband took me to Disney World to propose. Unfortunately, I developed a nasty case of pneumonia. Fortunately, he still proposed. Oh, and I survived the pneumonia… let’s not forget that!

It was our dream to take our kids to Disney World. So, this November we did exactly that. It was mostly wonderful and magical. Somehow when you’re planning a trip like this, you aren’t imagining the whining that will accompany it. I did plan for down time and expect that everyone would have their less than perfect moments but still it can be stressful when people get overwhelmed, overheated, and plain tuckered out.

What I discovered is that it is the first day and last day that matter most. A first day is all about first impressions and feeling the magic of the place. The last day is your last impression and what you will remember simply because it happened last. You want to leave on a good note. We had a wonderful entrance to the Magic Kingdom (which I will talk about in a future layout which I will share later) and our last day was our most relaxing day of all.

I was surprised to discover I am not as big a fan of Disney Parks as I had thought. Even with low attendance in the parks, I found it too busy, too loud, and some of the park staff (cast members) had unnecessary attitude. I did not expect the latter. No big deal on the first half of the trip but by the end I was tired and overwhelmed which made me oversensitive to everything around me. Just like my kids! I got my fill of the place and don’t need to go back for several years.

We have been back half a week and every night I have been dreaming of Disney. Just some little aspect of our trip, looping over and over all night long. I must be processing the trip. Last night, it was standing in a line on a ride. No wonder I woke up with a headache!

I have 3600 photos I need to sift through, edit, and print for my scrapbook. This could take awhile!

In the meantime, last night I made a layout!

I used Karla Dudley product. She is having a 25% off sale until November 30th. If you spend $10 in her shop, you’ll receive a free Holly add-on kit. It includes the template I used in my layout!

disneyxmas-160

credits:

Holly | add-on pack by Karla Dudley
Chris the kit by Karla Dudley
Holly the kity by Karla Dudley
Toolbox Mists v.2 by Gennifer Bursett
Toolbox Mists v.1 by Gennifer Bursett

November Simple Scrapper Community Show & Tell…

Every month I make at least a couple layouts using the templates and story starters (journaling prompts) that come with premium membership at the Simple Scrapper. I’ve been lucky to do this for the past five months when I joined the Simple Scrapper creative team.

Each month, Simple Scrapper is hosting a Community Show & Tell. I will link up this post with my layout to the Simple Scrapper blog. Make sure to check out all the other layouts.

Additionally, you can join in on the fun by sharing a creative project you’ve recently finished and want to share. Check out the Simple Scrapper blog for details on how to link up.

Here are my two most recent layouts:

nov13-single1LO-160

This layout documents our way of spending time together on Thanksgiving weekend.

Credits: Autumn Glory by Scotty Girl Design
Early Morning by creashens
Sketch template from Simple Scrapper’s Premium Membership

ssnov13-single3LO-160

This one is about the struggles of a parent watching their kids flourish while also worrying about their safety as they explore their world.

Credits: Early Morning by creashens, Sketch template from Simple Scrapper’s Premium Membership & Inspired by a Story Starter from Simple Scrapper?s Premium Membership

I hope you’ll join in and show us what you’ve made!


3 Things I’m loving

The room is a bit spinny, perhaps I should go to bed. There just aren’t enough hours in the day and I’m struggling to get everything done. Just wanted to take a quick moment to share three things I’m into at the moment.

1. Oral-B CrossAction toothbrush BzzAgent sent me some swag for their Crest Pro-Health campaign. I received Crest Pro-Health PROFRESH Toothpaste, Oral-B CrossAction Pro-Health Toothbrush, and Crest Pro-Health Multi-Protection Rinse. The toothbrush and toothpaste were already my favourite brand. The mouthwash was a bonus. I like the way it doesn’t burn my tongue. What I really love is the toothbrush. I’ve never had a better toothbrush. I hope Oral-B never discontinues making it.

mecrest

2. Honey, I Washed the Kids soap from Lush Cosmetics
I got a little star shaped soap at Christmas time. Because of the name, I thought I’d let the kids use it. I did BUT I fell in love with it and one day I treated myself to a bar all for myself. It smells so incredibly good. I want to eat it… well, not really. The soap is so creamy and doesn’t leave an itchy film. If I could only have one soap for the rest of my life, I’d pick this one.

lushsoap

3. The Everything Planner: 2013-2014 Printables by Gennifer Bursett
These charts and planners are going to make my life a breeze in 2014. I swear! They’re awesome in both functionality and prettiness. Wouldn’t you say? Calendars, Chore Charts, Checklists, To Do Lists.

ALSO… I am using them in my Project Life scrapbooking. I resized a calendar and to do list onto 4″x6″ cards to insert into my weekly layouts. I also cut out a strip of dates for a layout about back to school.

gb_tep_preview

plLO

Paper Issues blog hop and a Simple Scrapper giveaway!

Welcome to Paper Issues Simple Scrapper Sketches blog hop.

You should have arrived here from Danielle Higginbottom-Brown’s blog.

If this is your first stop, be sure to head over to Paper Issues to start at the beginning!

I’ve been on the Simple Scrapper team the past few months. I’d been quietly following the blog for a number of years. Being on the team opened the door to all the wonderful resources and community available with the monthly premium membership. Everyone is very helpful and supportive. I was pleasantly surprised how inspiring the combination of monthly templates, story starters, and general chit chat has been in motivating me to actually complete pages. I thought I was going to simply create digital layouts with the templates and learn a thing or two on occasion. What I’ve found is that I’m all over the place with excitement… digital layouts, paper layouts, and Project Life spreads. I don’t know… something just clicked for me after I became a creative team member. I’m excited to see what happens next.

Here is the layout I made with the Paper Issues Simple Scrapper sketch (I believe the template will be available on the Paper Issues and Simple Scrapper blogs).

Mritchie_augPI-160

539052_573439629383882_717936440_n

Aug 25 –Sep 9
Sponsor: Simple Scrapper
Theme: Sketches

1175145_573439636050548_323823733_n

Giveaway: {there are 2 prizes} 1 month subscription to Simple Scrapper
& Everyday Story Teller 1&2 download

Thanks for hopping with us today. For your chance to win:

1. Like Simple Scrapper on Facebook {tell them we sent you}
2. Like Paper Issues on Facebook
3. Leave a comment

Next up on the hop is Danielle de Konink’s blog.

What I did during my summer vacation…

… too much of this, too little of that, and now it is almost over. I can’t figure out where summer went. I’ve been looking under sofa cushions and in the back of closets. It has to be in there somewhere.

Today I’ll share some layouts I made this summer. I’ll leave out any that were in previous blog posts.

Enjoy these last days of August!

1. Love My Boy

DSC00262-160

Sketch template from Simple Scrapper Premium Membership.
This one is a 6×6 for my project life album. All traditional paper supplies.

2. One Happy Family

ritchie_aug_feb2013_SS-lowres

Sketch template from Simple Scrapper Premium Membership.
All traditional paper supplies.

3. Look What I Found

jul13-s1SS_toadstool-160

Sketch template from Simple Scrapper Premium Membership.
Penny Collection by creashens
Simple Stitches 2 by Karen Funk
Toolbox: Mist V.7 by Gennifer Bursett
Toolbox: Mist V.4 by Gennifer Bursett

4. My Life

sts_winsys3_virgo-160

Photo Journaling Cards Zen by Jennifer Valencia
Photo Journaling Cards Inspiration by Jennifer Valencia
Photo Quotes Set 2 by Jennifer Valencia
Window Systems Templates by Tiffany Tillman
Stargazer Papers by Dawn by Design
Constellations by Audacious Designs
Whale of a Tale by creashens
Hello Summer by Mye De Leon
New England Cottage by Mye De Leon
Polarod-ies set 1 by Karla Dudley
Life Defined by Karla Dudley
Stamp Press Life by Karla Dudley
Camp S’more Circle Stickers Brushes by Scotty Girl Design

5. Summer & Corn on the Cob

an_roughdraf4_corn-160

Roughdraft No. 4 by Audacious Designs
Manifesto Template (word phrase) by Audacious Designs
Happy Camper | Patterns by Robyn Meierotto
Camp S’more Elements by Scotty Girl Design
Holiday Essentials- Bits and Pieces by Deena Rutter
Life Bits by Audacious Designs
Wired Words No.1 by creashens
S’more Please papers by creashens
Enjoy | Journal Cards by Robyn Meierotto
You Are Labels by The Ardent Sparrow
Mellow Yellow by Karla Dudley
Camp S’more Papers by Scotty GIrl Design
Date Stamps 2 by Scotty Girl Design
Summer Days Word Art by Scotty Girl Design

6. Summer Fun

an_manifesto_t1_sum2013-160

Camp S’more Circle Stickers & Brushes by Scotty Girl Design
Mellow Yellow by Karla Dudley
Camp S’more Folded Papers by Scotty Girl Design
Camp S’more Folded Paper Solids by Scotty Girl Design
summer manifesto template by audacious designs
rumpus by creashens
S’more Please Elements by creashens
Day Camp Wooden Words by Mommyish

7. Fun & Adventure

an_manifesto_t2_sum2013-160

S’more Please Elements by creashens
summer manifesto template by audacious designs
woodpile papers by audacious designs
Mellow Yellow by Karla Dudley
Corner Wraps by Designs by Dawn
Silver Lining Collab by Celeste Knight, Deena Rutter, Gennifer Bursett
Wander Lust by Audacious Designs

9. This Beautiful Life

RWagler_BigPho_T2_Nyal-160

Endless Summer by Robyn Meierotto and Gennifer Bursett
Big Photo Templates by The Ardent Sparrow
Water Color Splatters by Celeste Knight
Stamp Press LifeStamp Press Photos by Karla Dudley

10. Yes, This.

RM-InStitchesT5_MitchBay-160

Dude Mini by Robyn Meierotto
In Stitches Template 5 by Robyn Meierotto
Endless Summer by Robyn Meierotto and Gennifer Bursett
Life Bits
Water color Splatters by Celeste Knight
Caffeine Papers by Robyn Meierotto

11. Look… A Rainbow

inStitchtempRM_PC-160

In Stitches 1 by Robyn Meierotto
Go Journal Cards by Robyn Meierotto
Let’s Go by Robyn Meierotto
Waterly Doods Alpha by creashens
Penny Kit by creashens

Oh my goodness, what a find!

Hello August! How quickly you made your appearance. The nights have cooled down and I’ve been enjoying sitting at my laptop scrapbooking with a cool breeze wafting over me. Wafting. That’s a strange word. I haven’t managed to accomplish a whole lot lately but I did take some time to create a few layouts and read an e-book or two. I’ll share my layouts another day. Today, it’s the e-book I want to mention.

While shopping at Pixels & Company, I came across an e-book by Jennifer Valencia called Black & White Adobe Photoshop Techniques. In case the title isn’t clear enough for you, I’ll explain. It’s a guide for photo editing in Photoshop to make your photos look fabulous in black and white.

I got the e-book because I’m not really that good at making my photos black and white. I rely heavily on the radlab plug-in. That’s fine and all but it would be great to learn how to get the effect I want all by myself. I was giddy when I read the table of contents listing all sorts of methods and important know-how.

What can I say? This e-book is well thought out, makes sense, and is easy to understand. I love when technical information is explained in a way that doesn’t make me dizzy. I had a lot of “ah yeah, ok, now I get it. That makes sense!” moments.

The author gives us the tools to judge when a photo would make a great black and white photo and when it is better left in colour. I’ve come away feeling like I have a more critical eye towards photography (both taking photos and in post-processing). I’ll be brave enough to use black and white photos more often in my scrapbook layouts now.

I followed along with her methods for achieving a good black and white photo.

Lforebookorig

Here is the original photo. Next are my two edits of the same photo. I used different methods to achieve each look.

Lforebook1a

I prefer the last one.

Lforebook1

Have a wonderful day. I hope to blog more often. Life got busy and I got tired. Happy Summer!


One Little Word 2013 Blog Hop: June in Review

OLWbloghopLOGOI’m taking the One Little Word class by Ali Edwards at Big Picture Classes. It’s a year-round class and you can start anytime. Every month on the 1st you receive your prompt challenge for the month. A group of class participants are using their blogs to share their thoughts on the month’s topic. To see all my posts listed, go to the top menu bar under “Documenting Life” and click on One Little Word.

d

It is summer!!! June is about to make its exit. Right now, as I type I’m listening to the whistling and popping of fireworks off in the distance. July 1st is Canada Day. People must be eager to celebrate as this is the second night I’ve been listening to fireworks.

Personally, I’ve had a lot to celebrate this past month. Summer is finally here! My parents came for a quick visit in the midst of their road trip with friends. My daughter finished her first year of school. I’m a guest instructor at Tiffany Tillman’s new scrapbooking website called Scrapaneers, which opens August 5th. My lesson is part of the class All Star Techniques. Last, but not least, I had a fabulous weekend with my family, being tourists in our own city, and visiting the beach. 

When I first saw the challenge for June’s One Little Word, I was stumped. I had not a thought in my head. This past month, I found it very challenging to think. Bit of a brain fog really. I’ve had various tasks to do and couldn’t do them because I can’t focus or concentrate. PRO-BLEM! I even tried the task a few times over the month. Nope, wasn’t going to happen. Tonight, I will answer these questions. NOW. In a blog post. You with me?

So, here is my mid-year reflection…

This process has been ENGAGING.

SURPRISINGLY, I did a lot of soul searching as a result of choosing to have “one little word”. My word is Authentic. I wanted to find how that word has meaning for me. I wasn’t always thinking about whether I was being authentic. I am pretty good at being me. It was more that I was trying to find ways to BECOME the version of ME I want to be. I project a certain image of myself to the world. I convince myself that I am that person. Honestly, I am not always that person but I want to be. At this point, I’m authentically flawed… that’s my new starting point.

I’m PROUD that I am trying. In this process, I’ve discovered that the way to become more authentic is to be mindful. In a way I have two little words. Mindful is the word I must actively practice and Authentic is the guaranteed result of that practice.

I have ENJOYED how the word Authentic has given me a new way to look at the world. I like control. If you’ve read my other posts, you know I have a problem with “shoulds” (Things SHOULD be this way. Things SHOULD be that way). I want the world to run in a peaceful, organized, responsible, and safe way. I get angry and depressed when I don’t get my way. I can’t control the world and trying to diminishes the joy in my life. Joy is abundant in my life and I dull it with my worries and fears. Through choosing the word Authentic and attempting to become more mindful, I’ve discovered I can control the world after all. If I can control my thoughts, and I have a way to cope with uncertainty, I can be happier. I can attempt to make peace with all that saddens and frightens me in the world.

I have ENJOYED the creative process of making a vision board and choosing actions for the year. I have ENJOYED delving deeper into myself and making something creative with those thoughts. I have ENJOYED blogging about each month and reading the experiences of others.

All of this has been CHALLENGING. The toughest part of this process has been changing old patterns of behaviour. I’m trying not to be too hard on myself. It’s a process and it will take a long time. For example, I might be disappointed in myself when I lose my temper or feel overwhelmed. The positive is that I now know I have other options. I hear that little voice in my head telling me I can calm down, that my anger or fear is a choice. I can take a deep breath and refocus my energy. I sometimes tell that little voice where to go, and allow myself to get angry anyway but I know that with practice that little voice will become louder, and I will become more disciplined with my choices and actions.

By the END OF THE YEAR, I’d like to feel I am stronger. I can be bit of an interesting character. I think sometimes I try to hide it. Weird as it may sound, I’m conflicted with feeling both ashamed and proud of being who I am. Insecure, I guess. I need to care less about how others perceive me, and maybe get over myself. Funny how being more “mindful” of myself might actually help me be less self-involved. Who would have thought?

So, that’s the big recap on 6 months of Authentic one-little-wording. Thanks for joining me! See you next month!

You came from Amy’s blog. Next up is Naomi’s blog.

If you need to start at the beginning, please go to Lee’s blog.

Oh and I’ll take this moment to mention a contest… forgive me for the blatant plug 🙂

Namaste!

On my mind: School’s out for summer! Scrapbooking! $10 off All Star class!

Lots going on right now. My eldest finished her first year of school yesterday. Today was our first official day of “summer”. It rained and rained and rained and then it rained some more. None of us seemed to mind. We slept in. We had a late breakfast. Our day consisted of Playdoh, drawing, games, and movie watching. I was almost giddy that we’re on “summer time” now. I liked that I have regained control of my days. No racing to catch buses, no structuring my day around school schedules. We just got to live our day on our own terms and I quite liked it. Pretty good considering I had a wicked headache and a long list of chores to accomplish.

Anyway, I thought today would be a good day to share some digital scrapbook layouts I’ve recently made.

Oh, and if you’re considering taking the All Star Techniques class at Scrapaneers (opening in August), pre-registration for the All-Stars class ends July 1st ($10 off!). I’m happy to say my contribution is Lesson #4, which is great because 4 is my favourite number!

So, before I show you my layouts, I’ll take a moment to wish you all a happy weekend!

scd_pp3_ocanada-160US

Credits:

Hello Eh by The Ardent Sparrow
Paper Stacks Templates by Scotty Girl Design

sts_nts_4_dadday-160

Credits:

My Dad Arrows by WBI
Fatherhood | Word Art by Robyn Meierotto
Dad’s Day | the buttons by Karla Dudley
Dad’s Day | the letterpresses cards by Karla Dudley
Dad’s Day | the cardstocks by Karla Dudley
Now that’s Sweet templates by Tiffany Tillman
Brushies No.1 by creashens
Bubbly Stamps by creashens
Toolbox: Mists V.5 by Gennifer Bursett
Hello Summer Smears by Mye De Leon
Fatherhood | Patterns by Robyn Meierotto
Framed by Karla Dudley

dr_d365-24_splashj24-160

Credits:

Silver Lining by Deena Rutter (tag)
Scenic Route Full Kit by Deena Rutter
Wheel O’ Fortunate Word Art by Deena Rutter
Layered Layouts v.6 by Deena Rutter
Pura Vida Full Kit by Deena Rutter
Count On Me brushes by Deena Rutter
Whale of a tale by creashens

Save $10! Pre-register for All Star Digital Scrapbooking Techniques

I wanted to let all of you know about the pre-registration sale for All Stars Digital Techniques at Scrapaneers, opening August 5th. Register between now and July 1 and save $10.00 on the price of the class for either the Photoshop or the Photoshop Elements version.

I am very pleased to say I’m one of the instructors in the All Stars class. The entire class is self-paced with over two hours of video lessons geared towards the intermediate digital scrapbooker. Be sure to check out the class description to see the line-up of amazingly talented instructors… I can’t wait to learn a few new tips and tricks!

The photo below shows a sneak peek of my video lesson.

Sweet Little Perpetual Calendar

I get a bit nervous when it comes to craft projects. Yeah, I know… you didn’t expect me to say that. I over think things and then think I can’t do it. I need to get over that.

Anyway, several years ago I bought this little wooden perpetual calendar at a dollar store. It had the months and days printed in crooked black text on the wooden blocks. I knew it could be a beautiful calendar when adorned with pretty papers. I just waited for the right supplies to inspire me.

The other day I was browsing the shop at Pixels & Company and I came across Penny Kit (the bundle) by creashens. Isn’t it cute? I added the digital kit and Brushies No.1 (also by creashens) to my cart and got to work!

Image

Now I have a million and one pieces of physical scrapbook paper and products sitting on my craft table but it was the digital scrapbook kit that inspired me (it included awesome papers and washi tapes).

I measured the wooden blocks and in my Photoshop I recreated shapes in the same size. I needed a back and two sides for the calendar holder. I contemplated covering the inside of the holder too but decided I liked the wood. I made 12 squares for the number blocks, and 12 rectangles for the months.

I dragged in the papers I liked and clipped them to the shapes. I used the Anodyne font and used the colour picker tool to select colours to match the papers. Honestly, the hardest part of this whole project was choosing colours that matched AND stood out from the background. Oh, and you only need a 6 OR a 9, not both. See my image below to know which numbers need to be used for this project.

For the rectangles, I clipped in my papers and then added pieces of washi tape. I added my months with the Anodyne font. To make the text stand out more, I used the Brushies No.1 brushes to add a bit of white (usually) background.

Image

I printed my document out on matte Epson presentation paper. I used an exacto knife to cut out the shapes. I applied liberal amounts of double sided tape to the wooden blocks and stuck the paper to the block. I used my exacto knife to trim any paper that went off the edges of the block. Then I lightly sanded the edges. You can omit that step if you like.

That’s it… now I want to see if my local dollar store still has these. I want to make more!

Image

Scrapaneers!!! Are you READY for this?

Happy Monday Morning! Boy, do I have a BIG announcement for you today! Tiffany Tillman, the guru of digital scrapbooking (not just my humble opinion) is opening up an online learning centre called Scrapaneers. There will be workshops from various experts in the industry. I’ve seen some of the names… prepare to be educated and amazed! Oh, and there is also me… yup, I am THRILLED and incredibly grateful to be included as an instructor in the All-Star Techniques workshop. Can you hear my “wahoo”? Seriously, open your window…can you hear it?

In fact, here is a sneak peek at my video:

Sign up for the All Access Pass here. Hope to see you there soon!

Love me, Love my Bokeh.

Either you’re reading the title going “ah yes, I love Bokeh” or you are wondering what the heck I’m going on about. The third category would be that you simply don’t like Bokeh. I don’t think that is possible so I’m not offering that as an option. Who doesn’t find it fabulous?

Bokeh is the quality of the blur in photography. You know, all those pretty circles (usually) of light. They add such ambience to a photo. You can achieve the look with your camera if you know what to do and have the ability to use manual mode. Or you can add your own with a digital product. Today, Nancie Rowe Janitz added some Bokeh Photo Overlays to her shop here. I played around with them quickly with some photos I took a month ago. What do you think?

4 3 2 1

This is the product I used:

Bokeh_Photo_Over_519ff4cc8519d

It is “I ♥ Nancie” time again… Part Four

Well, that took awhile! Life got busy so my last installment of Project Life, beautified with Nancie Rowe Janitz products, is a bit late being posted. I also snuck in a few of Nancie’s newest items from her digital shop. To see all her digital offerings, check out her store at JessicaSprague.com.

I hope my previous posts have given you ideas on how you can incorporate Nancie’s digital items into your Project Life album, whether you are a 100% digital or hybrid scrapbooker. I’m still learning what works best for me. I had fun with this series of blog posts as it gave me an excuse to play around and try new things. I tend to get intimidated easily by products and techniques that are new to me. I’m sure many of you are like that too. The best advice I can give is to just jump in and try it out.  Here are my firstsecond, and third posts to see what has been covered so far.

If you need a refresher on what Project Life is, please check out Becky Higgins’ site Project Life.

The items I made in these blog posts were actually used in Week Twelve AND Week Thirteen of my 2013 album. I am only showing you Week Twelve at the moment. Week Thirteen is not finished because I had an issue with my printer.

Normally, my weekly spreads are heavy on photography. I like taking photos and usually struggle to find a place to put my journaling. Week Twelve was a rare exception. It was the week I got the flu. I didn’t do a whole lot that week and I barely took any photos. Deciding how to fill my page protector took some serious thought.

So, here is how it looks as a two-page spread:

PLnanfinalall

Here is the left side. For the title card I added a dymo label, some transparency elements and a staple to the card I made digitally. The card on the top right is one of Nancie’s Life Journal: In The Mix 4×6″ Accent Cards. After printing it out I added a couple dymo type stickers and wrote my journaling. For the first 3×4 card I added a word bubble from Nancie’s  Life Journal: Say What!?! and adhered with a piece of foam tape to one of Nancie’s cards. I’ve mentioned card two and three before. For the fourth, I added a photo of my daughter and wrote some journaling on top of the card I’d made with Nancie’s product.

The bottom left card was fun to make. I placed my silhouette die cut shape (by Nancie) on my card as a mask. I sprayed overtop. I took off the die cut. I didn’t think the word “life” showed up enough as just white space so I outlined it in silver. I wasn’t totally thrilled with it until I placed the die cut back and offset it slightly. Now I love it. You can see a bit of the white space and silver outline behind the die cut. I added a bit of journaling. The bottom right card was my attempt at trying something new. I doodled. I used a blender pen. I used mist sprays. I put a piece of vellum (with specks of imbedded glitter) over the left portion, then traced the butterfly and flower again. I painted my doodled girl with ink and a blender pen. I added dymo labels. It says “dreaming of… Easter, spring, new ideas, fun”.

PLnanfinala

Here is the right side of my spread. The top two cards did not involve Nancie’s product. I had intended for photos to go in these spaces but I didn’t have the photo bug that week. Just a stomach bug.

The middle far left and far right cards used Nancie’s supplies. Both are mentioned in a previous post. I added washi tape, stickers, and a stamped image to the card on the left. The card on the right hasn’t changed since the last blog post. For the bottom right card I journaled about my daughter getting her first allowance. I was VERY excited to find that one of Nancie’s cards had an account ledger type design to it. Perfect! It is from her Life Journal: In The Mix 4×6″ Accent Cards.


PLnanfinal

So, there you go! I hope you’ve enjoyed this series of posts. When I get some time I’ll post Week Thirteen so you can see how I used the rest of the cards I made with Nancie’s products. They were pretty evenly split between the two weeks. In the meantime, please link to your projects using Nancie’s supplies. I’d love to see what you’ve made!

Happy Crafting!

Pixels And Company iNSD Creative Team Blog Hop

Hello hello, fellow bloghoppers. You’ve found yourself in the midst of the Pixels & Company iNSD CT blog hop!

What does that mean? Each creative team member has chosen four of their favourite products to highlight on their blog.

Then each of us reveals a letter. You need to collect all the letters in order to spell out a phrase. That phrase will get you a free set of journal cards. The journal cards have been made by the creative team using papers and elements from the Pixels and Company Designers’ iNSD  “More or Less” kit collaboration.

pco_mol_jc_preview

So, here are my four favourites. I’m sure you’ll like them as much as I do:

ctbloghop_ready

Why do I love these? Let me count the ways:

Artistic Photo Masks Five by Simply Tiffany Studios – These masks are dramatic. They make a real impact. I clip my photos to them but occasionally even papers. They are great for a blended, artistic feeling page. They are great clustered (as shown in the preview) or as individual frames. A very quick way to spice up your layout.

InstaLuv by Karla Dudley – These are FAB-uu! Seriously, I use these all the time. You can personalize the frames in so many ways. Lots of variation. Room for titles, a phrase, or just your photo. Totally up to you. You’ll use them again and again.

Pitter Patter kit by creashens – Ok, it is freakin’ adorable. It really is. I’m mostly nostalgic about it because it is the first kit I ever used by creashens. That opened a whole world of wonder for me. I am grateful for that.

I also love creashen’s whimsical style.

Keeping Tabs: Weekday Files by Robyn Meierotto – I can’t get enough of how awesome these look. Really awesome. I used one in my Project Life. I use them in fully digital layouts. You can journal on them. Layer photos and elements on them. You name it, just do it!

Was that enough enthusiasm for you? I hope so.

This post was brought to you by the letter:

U

You came from Celeste Smith’s blog . Next up is Aria Andrus’s blog .

And if you’d like to start back at the beginning, here is the complete, in order list:

P&Co Blog

Sarah Hemmert 
Katherine Hansen
Mandi Buchanan
Kate Christensen
Rachel Alles
Anna Drozd
Jan Fortier
Carey Bridges
Emilie Stevenson
Ronnie Crowley
Amy Kingsford
Jennifer Hignite
Celeste Smith
Melanie Ritchie —> hey peeps, that’s me.
Aria Andrus
Jennifer Evangelista
Linda Roos
Christy Carlson
Barbara Unzen
Mary Rogers
Arielle Gordon
Jeryn Carlisi
Indah Permata Sari
Melanie Call
Jen Papadimitriou
Erin Taylor
Kelly Mobley
Kim Hammond
Wendy Bretz

It is “I ♥ Nancie” time again… Part Three

I’m back again with another foray into the world of Project Life, beautified with Nancie Rowe Janitz products. To see all her digital offerings, check out her store at JessicaSprague.com.

My goal is to show you how easy it is to use her products in your own Project Life album (whether it is 100% digital, or a hybrid mish mash of printed and digital). My Project Life is a mix of digital layouts, digital items printed out, and traditional paper supplies. My album is an excuse to get creative and experiment with new techniques. If you need a refresher on what Project Life is, please check out Becky Higgins’ site Project Life.

Here are my first and second posts to see what has been covered so far.

Last week, I showed several ways Nancie’s word art can be used. We covered turning a word into a cutting file for the Silhouette, making a digital journal card with drop shadowing to make it realistic, and stamping onto your photo.

Today, I will show you my layout as a work in progress. So often I’ll look at Project Life spreads on the internet. I ooh and aah over them wondering how they achieved the look. I’m going to try to show how things look as I work on the spread. So when you see it completed in my next post, you’ll have an idea on how to use the same products.

1.

nanPLpost3f

Technique #1: Using Digital Paper as a background. 

Ok, this card isn’t from the week I have been working on for this blog post. It is from Week Two (in case that wasn’t obvious). I printed out one of Nancie’s Painted Pages – Botanicals papers onto a 4×6 card. I painted part of the card with a shimmery white paint. Then I covered it with Thickers alphabet stickers. Done.

supplies used: Painted Pages – Botanicals, white shimmery ink, alphabet stickers

2.

nanPLpost3a

nanPLpost3e

Technique #2: Making Journal cards with brushes or papers

I love this technique the best. I usually have a lot to say so I like making journal cards. For the one above I used a “true story” stamp from Nancie’s StoryStarts Vol. 1:The Real Story . For the lines, I cut out a set of dots and cut/pasted them into a double lined row. Then I cut and pasted that row into a few more. Voila, journal lines!  I printed out the card, rounded the corners, and now I just need to finish my journaling. Not sure what I’ll do with the photo that is currently covering the card.

You’ll notice all the sticky notes. I use them ALL the TIME! They are AWESOME! I use pencil so I can use the sticky notes again. I take them off as soon as I am done each pocket. I use them to remind myself of the topic I want to journal about or of the photo I want to place. If I don’t use them, I have chaos. Here, I’ll make this text yellow like a sticky note so you remember to try this in your own system.

In the card to the left of the “True Story” card, you’ll see it has a ledger paper from Nancie’s Old Ledgers Papers. I often use patterned papers that have a grid or ledger to make journal cards. I love this look. I tend to use a journal card with lines or a grid. Otherwise I write slanted.

My other tip? I always write with a pencil first. I use a Zig Millenium pen for my journaling. I also like Micron markers. Then I erase the lines after with a white eraser.

In the bottom left card I printed out one of Nancie’s Moments: 3×4 Accent Cards, and the card on the right I used StoryStarts Vol. 1:The Real Story, and added a brush stroke from one of Nancie’s products. (Forgive me, I have totally forgotten where I took it from… but I do know it is a Nancie product.).

supplies used: StoryStarts Vol. 1:The Real StoryMoments: 3×4 Accent Cards, Old Ledgers

3.

nanPLpost3b

Technique #3: Make your own cutting file.

I took words from Nancie’s This Day Stamp Set and imported them into the Silhouette Studio software. I placed them in a way I found attractive. I made sure each element (here, &, now) were touching at some spot and welded the words into one piece. I traced it and cut it out onto a yellow paper. I added little mirrors to the card to remind myself that life is always changing and to be mindful of the moment I am in.

The blue card to the left is another of Nancie’s papers from her Sweet Stories 1. See how great her papers work as background filler cards?

supplies used: This Day Stamp SetSweet Stories 1

4.

nanPLpost3c

Technique #4: Adding focus to your cards

The card on the right was one of Nancie’s Moments: 3×4 Accent Cards. I took one of her Crazy for Chevron brushes and added it to the card and then printed it out. I am going to add something to the bottom portion of the card. The chevron will give focus to the part I need to add.

The card on the left uses one of Nancie’s Certified Organic 1 brushes. Again, I’ll use the lines as a guide for my journaling.

supplies used: Crazy for Chevron 1: Handcrafted ,   Moments: 3×4 Accent Cards ,  Certified Organic 1

5.

nanPLpost3d

Technique #5: A mini digital layout works too

Sometimes it can all be done in Photoshop. I really do like my Project Life to be a blend of digital and traditional supplies. I like the depth and texture of using both. However, sometimes it is just easier to go all digital! For me, anyway. The card on the left is a good example of that. I used the Sweet Stories 1 paper as my background. The paper already had a pink square perfect as a frame for my photo. I used StoryStarts Vol. 1:The Real Story  to add “the 411” brush and another chevron brush. I printed it out and added my own journaling. So I guess it wasn’t totally digital as I added the journaling afterwards. Oops.

The card on the right, I used another paper from the Sweet Stories 1. I added “Remember” from the This Day Stamp Set. I still need to add either journaling or a photo to the framed part.

supplies used: Sweet Stories 1,  This Day Stamp Set ,  StoryStarts Vol. 1:The Real Story

In my next & final post of this series, I will finish off my cards with some embellishments using Nancie’s brushes. I’ll show you my completed cards and how they look all together on a finished Project Life spread.

If you have used Nancie Rowe Janitz product on your Project Life, share a link in the comments section. I’d love to see what you made.

Happy Crafting!

It is “I ♥ Nancie” time again… Part Two

Alright, today is the day I show you what I’ve been doing with Nancie Rowe Janitz’s digital products. If you haven’t checked out her website, now would be a good time! She also sells at JessicaSprague.com and Society6. Her paper scrapbooking products are licensed through Fancy Pants Designs.
My goal is to show you how easy it is to use her products in your own Project Life album (whether it is 100% digital, or a hybrid mish mash of printed and digital). My Project Life is a mix of digital layouts, digital items printed out, and traditional paper supplies. My album is an excuse to get creative and experiment with new techniques. If you need a refresher on what Project Life is, please check out Becky Higgins’ site Project Life.

My original plan was to show you various techniques and then show you my finished layout at the end. Turns out my blog posts are like my mind… scattered. So, it will be more of a display of how I go about the process.

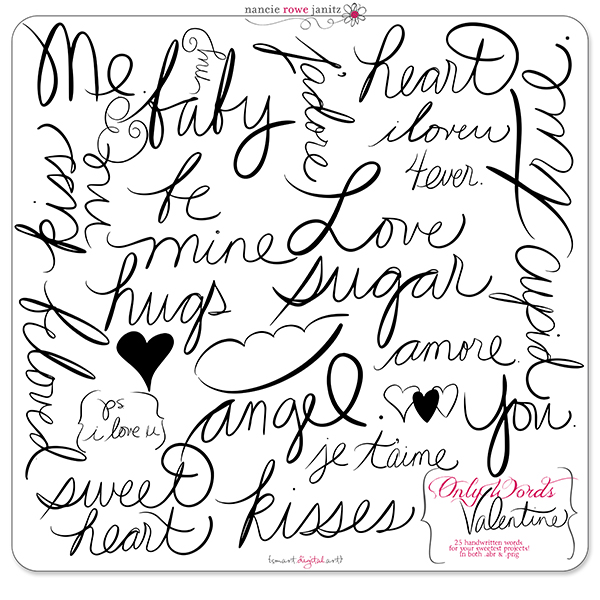
Today I want to show you various ways to incorporate Nancie’s “Only Words” handwritten words into your project life. She has several other products that can be used in this way. These are digital brushes but Nancie also includes the .png file. The brushes are in a file that ends with .abr. Usually all I have to do is double click on it and they will install in my Photoshop. Then I select the brush I want and stamp it on my layout. I recommend using brushes because you have control over the size and orientation. If you aren’t quite ready for all that, open up the .png file and place into your layout. That works too.

First, I’ll show you some of Nancie’s “Only Words” products:

Just_Words__Hear_50f57d93281f3

Only Words: Heartfelt

Only_Words__Vale_510813040e459

Only Words: Valentine

Only_Words__Toda_5155bad001fd5

Only Words: Today

Oh and I also used this lovely product in one of my examples:

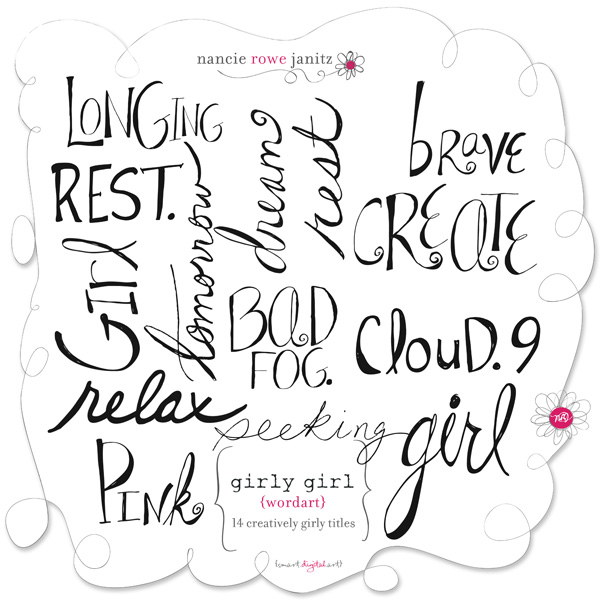
Girly_Girl_Word__4f121d7dd0c26

Girly Girl Word Art

Ok, so there are some of the word packs. Now I will show you three ways I used files.

Technique #1: Stamping on your photo

I used the brush called “seek” from Girly Girl Word Art and simply stamped the word onto a new layer. I moved it where I wanted it on the photo. I really like this effect. I’ve been writing on my photos a lot more recently. I also added the date stamp from Nancie’s This Day Stamp Set  which I will mention further in an upcoming blog post.

nanciePL2

Technique #2: Silhouette cutting machine

Ok, many of you have electronic cutting systems. For those of you who don’t, I’m sorry to leave you out on this one. I have a Silhouette machine (the old original) so I can’t speak for anyone using a Cricut. I’m not familiar enough with how they work.

Cutting files are great. Did you know that you don’t have to have special files to use them? I just imported a .png file “life” from Only Words: Today. After importing I had to 1) select the trace area 2) trace 3) size to fit a 4×6 card and 4) cut. So far I just placed the word in a page protector. You’ll have to stay tuned to see what I do with it.

nanciePL2_3

Technique #3: Making a Digital Journal Card

I used the “week” brush (#7) from Only Words: Today. Again I stamped it on a new layer.

Let’s see, how did I do this? I made a layer and used a large soft brush and painted a diagonal red line in the corner. Then did an orange stripe next to the red. Then yellow, green, blue and so on. I clipped the rainbow coloured layer to the layer with the “week” brush on it. Then I added a drop shadow. I right clicked on the effects layer and chose “create layer”. This separates the drop shadow onto its own layer. I used the warp tool (edit/transform/warp) and pulled a bit at the shadow to make the text appear to lift off the page a bit. You could also use the smudge tool instead of the warp tool if you prefer. I wanted to make the word appear to look like a cutting file would. Do you think it worked?

For the background of my card I used one of Nancie’s PDQ Overlays Vol.13 and blended a layer of cream that had a “screen” effect on it.

Once I printed out the card, I rounded the corners and added a dymo label. Voila!

nanciePL2_5

I’ll be back soon with the next installment of Nancie/Project Life synergy.