I’m a Quilter, how splendid!

It seems like quite the exaggeration to call myself a quilter. However, I did piece fabric together with thread. So, I guess that is what I am. As Lilla Rogers likes to say, “All great artists start at the beginning”. So here I am, the beginner quilter.

I’ve wanted to quilt for years. The thought of actually doing it intimidated me. A couple months ago I downloaded the Periscope App and it imported my social media contacts. One day the app chirped at me to say one of my contacts was “scoping” live. It was Alyssa Thomas of Penguin & Fish. I knew she was the artist and author who makes whimsically adorable embroidery patterns and fabric. I was curious so I tuned in. She crafts nightly at 9:30CST. She’s so friendly and down-to-earth. I’m learning so much just by watching her.

I remember my grandma once tried to teach me to crochet. Her fingers moved so quickly I couldn’t follow along. She didn’t know how to slow down enough for me to learn. So, I never did learn to crochet. My Mom taught me to knit and sew. I was never overly adept at either but I did make a few things. I also taught myself embroidery but it wasn’t exactly full of proper technique. I did do a pretty awesome Kurt Cobain on a friend’s pair of jeans. I wish I’d taken a photo of that. Back then the only way to learn was to get a book from the library or find a relative who could teach you.

Fast forward to 2016, and the resources are amazing!

1. I’m watching Alyssa on Periscope which is like having that relative show me how to do things properly. I can’t explain how invaluable that is. Otherwise I’d stand at my craft table totally bewildered wondering where to start.

2. There are free challenges and patterns out there to try. Alyssa mentioned that she was part of the “Splendid Sampler” Quilt-Along. 100 mystery block patterns will be revealed twice a week for participants to quilt. The blocks are designed by a long list of artists. After the year is done the blocks will only be available in a printed book. Different techniques will be required throughout the quilt-along.

3. The groups of crafters are plentiful. Someone somewhere has encountered whatever quilting challenge you are facing and is willing to share their solution.

I have to wonder what my crafting skills would have been like as a teenager if I had access to today’s technology.

So, here is what I’ve made so far.

The block with the little Kimono clad girls is the “bonus” block handed out last week. It is my VERY first block EVER!!! It’s crooked and the points don’t match up BUT I did it and I’m proud!

The block with the heart is the first mystery block. 1 out of 100. I’m happy with it. I even needle turn appliqued the heart. Yahoo!

I’m not really going for perfect here. I want a colourful and quirky quilt that makes me happy. I do not have a big stash of fabric. Several years ago I bought some lovely fabrics off of superbuzzy, thinking I’d sew my baby some clothes. HAHAHA… what was I thinking? That didn’t really happen and now my nearly 8 year old likes to dress herself. So, my quilt will use up the few fabrics I have, plus snippets from baby clothes, and some fabrics I will purchase soon.

Today there is a new block so I must be off to check it out! Until next time….

My first blocks | Melanie Ritchie


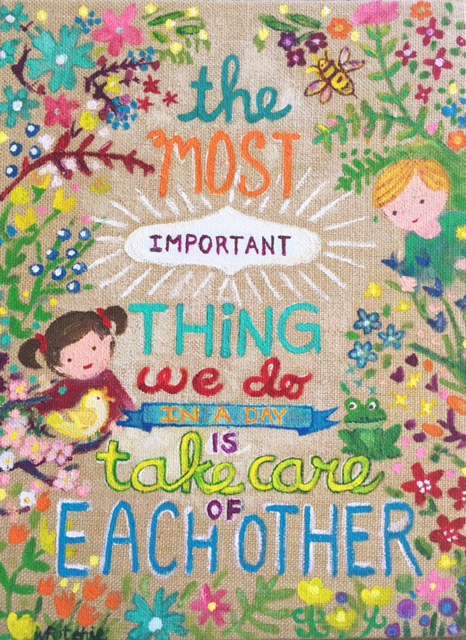
The most important thing we do in a day is take care of each other.
While I was busy galavanting, eating, and entertaining, life outside the home apparently went on without me. Who knew?

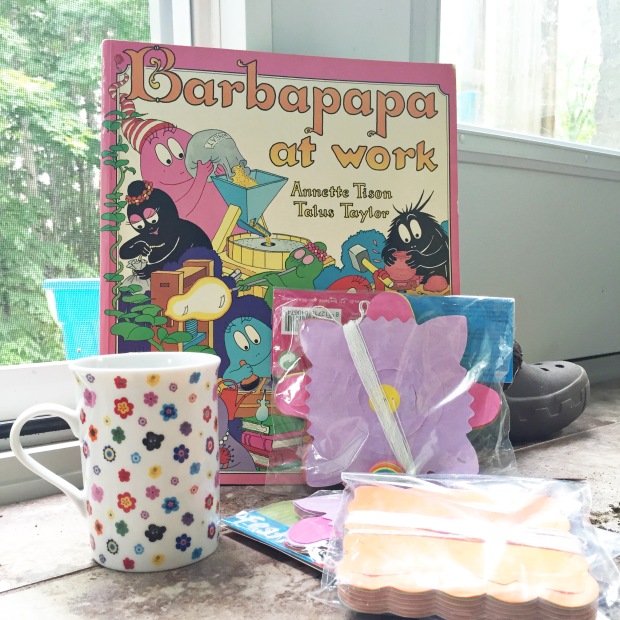
I’ve had a busy few weeks. I had the pleasure of babysitting a sweet little baby for a week (well, a few days really). I got an awesome thank you gift for helping out. The mom knows I’m a big fan of Barbapapa and she spoiled me with a vintage book and a flowery mug, and some party streamers from Amsterdam. See those little Barbapapa faces in the flowers on the mug? Oh, Happy day!

Barbapapa Gift | Melanie Ritchie

Then my best friend from high school came for a visit. We had some really good eats and had a long overdue chance to just hang out and catch up on our lives. We also watched “Reality Bites” which was our favourite movie to watch together 20 years ago. I can’t believe how quickly time passes. I was surprised to see I still like the movie and my opinion of the characters hasn’t changed much. I had to laugh about us though. Back in the mid-90s we watched the movie in the basement of my childhood home. Or maybe in her home. We drank Coke and ate Little Caesars Pizza or a bag of chips. Now we’re both Moms of young kids sitting in my home commenting on how delicious the fancy cheese and baguettes taste. Subtle changes! Ha!

Sunset in Ottawa | Melanie Ritchie

Our first night finished with a lovely sunset in downtown Ottawa.

Drinks | Melanie Ritchie

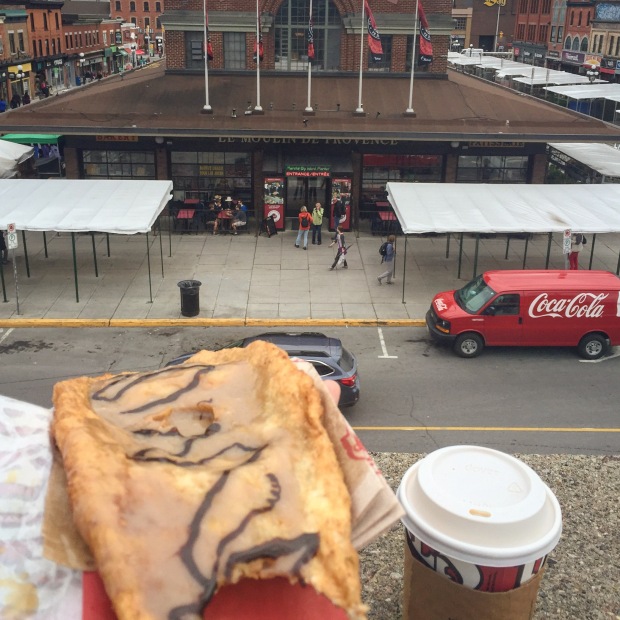
We had a really yummy lunch at Burrito Burracho in the Byward Market. I highly recommend the Tortilla soup. Then we wandered a bit before treating ourselves to a Maple Beavertail before heading home. YUM YUM!

IMG_2919

It was just so good to see her! I was sad to see her go. She gave me a very pretty bracelet from Alex and Ani as a hostess gift. It has a little pineapple charm. Pineapples are a symbol of friendship and hospitality. How perfect is that? Plus, I love pineapples.

The day after my friend left, my family and I went camping with friends at a very kids friendly KOA campground. Despite the initial rain and the plummeting temperature at night, we had a great time. Only a few weeks until our next camping trip!

After the rain | Melanie Ritchie

Upon return from camping, we had a visit from my husband’s Aunt. She is awesome. That’s all that needs to be said about that.

Then I spent the next day preparing for my very first Thirty-One gifts experience. I set up a table at the kids’ school’s Fun Night. I’m selling Thirty-One products to fundraise for the school’s Kindergarten playground project. There seemed to be a lot of interest in the products but the best part was getting to talk to other parents. Normally at events I’m busy with the kids and I have no particular reason to start up conversations with strangers. This was a great way for me to be more social.

Then the next day my parents came to town for my daughter’s Highland dance recital. It was a really good show! I also enjoyed shopping for plants with my mom and my daughter. I had trouble limiting myself to a few carefully chosen perennials. My mom bought a few plants for me  too as a very early birthday gift. Yay!

Plants | Melanie Ritchie

On the weekend, I had various things to do but managed to work on something that has been brewing in my head for awhile. I greatly admire the Junior Kindergarten teacher that taught my daughter two years ago and is finishing up teaching my son this year. She’s just a lovely person with a very gentle heart. She is exactly the type of person I hoped would teach my kids. She inspires the kids with exploring nature, science, and art. She encourages them to think critically. Most of all, I love that she teaches compassion. As a thank you I wanted to create a painting for her. I chose to illustrate her class motto which I think should be everyone’s motto.

The most important thing we do in a day is take care of each other.

I was thrilled the painting came together so quickly. I’m often disappointed and frustrated with painting. Things don’t always turn out the way I envision them. This one just made me very happy from start to finish. Maybe because I like the motto so much? So, today I took it to the school at midday and surprised her with it. I think it is fair to say, she likes it. Which makes me very happy! Although, I am sad that I won’t have a reason to talk with the teacher anymore.

Taking Care Artwork by Melanie Ritchie

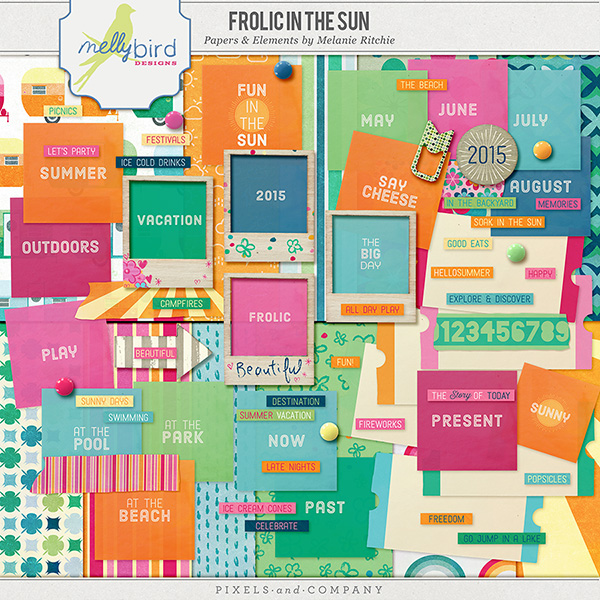
I came home and sat down to write this post and remembered today is the day my newest designs are released for sale at Pixels and Company. I can’t believe I forgot! I’ve been so busy! I’ll show them to you now. Tomorrow I will sit down at my computer and get started on all the design ideas that have been gathering in my head the past few weeks.

Frolic Full Kit | Melanie Ritchie

Weather Cards | Melanie Ritchie

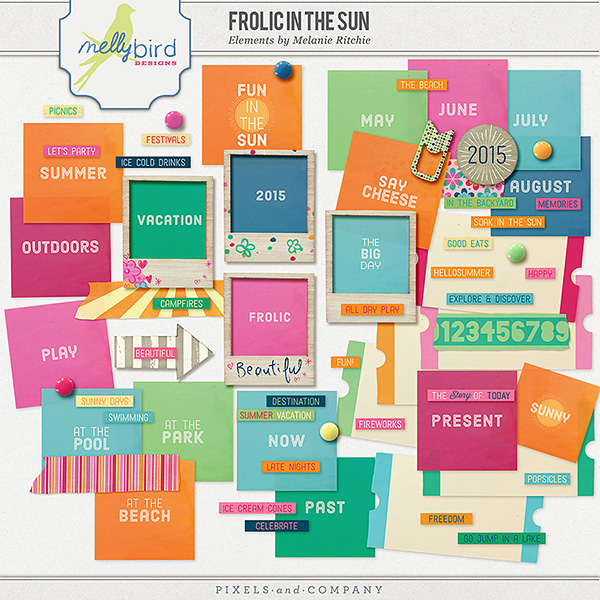
Frolic Elements | Melanie Ritchie

Frolic Papers | Melanie Ritchie

Frolic Journal Cards | Melanie Ritchie

Frolic Cupcake Labels | Melanie Ritchie

Have a relaxing Monday evening!

I’m such a school girl!

Really? No. For the past three weeks I’ve been immersed in an online class I’m taking at Lilla Rogers Studio School called Make Art That Sells.  We have two more weeks to go for Part A of the class. So far we’ve covered bolt fabric, Home Decor and Children’s Book Illustration. Every week we get a mini assignment to sketch, sketch, sketch a topic. Then midweek we get the actual assignment which utilizes the sketching we’ve been doing.

If you’re not already familiar with Lilla Rogers, she is an internationally successful illustration agent and artist. She represents several extremely talented artists. You might not know their names but I’m almost certain you’ve seen their products. Lilla will mention her artists’ products in her lessons as examples and often I’ll find myself thinking “oh, I’ve seen that! I didn’t know she represented that artist!” One of the books I love from our local library is by her artist, Mike Lowery. One of the fabrics in my dining room table cloth is by her artist, Suzy Ultman.

The class has been challenging, emotional, exhausting, enlightening, and rewarding. A rollercoaster for sure. Lilla is a big believer in staying positive and to keep making things you love. Don’t compare yourself to others. We’re all in different stages of our careers and at different skill levels. I think because she is an artist herself, she knows what kind of insecurities we have as artists. One of the biggest is thinking we’re not good enough. As Theodore Roosevelt said, “Comparison is the thief of joy.” It is easy to give up when you’re browsing online galleries and Pinterest and are blown away by all the amazing talent out there. Ultimately, you have to sit down, pick up a pen and paper (or whatever medium you use) and make something that makes you happy. Practice until it looks the way you like it. That is really all you can do.

Ok, I’ve digressed a bit. My personal struggles have been over getting into the mini assignment. I get very restless and fidgety. I resist the assignment. The first week, my son was home sick for three days and on the third day, there was a crisis in Ottawa which completely distracted me. The next day I focused and made up for lost time. I liked my submission but it could have been better had I been able to use my time efficiently. I was pretty darn excited when it made the review for class where Lilla talks about several pieces and explains how they worked well. The product we were to design was for bolt fabric.

matsa_wk1_mritchieLORES

The second week, I needed to sketch more but again resisted the process. I’m still unsure why I’m having a hard time just drawing for the sake of drawing every morning. I have to think about this. Luckily, I had a very strong idea of what I wanted my art to look like and was thrilled when it ended up looking the way I envisioned it. That rarely happens. The assignment was to design a plate for the Home Decor market.

matsa_wk2_mritchielores

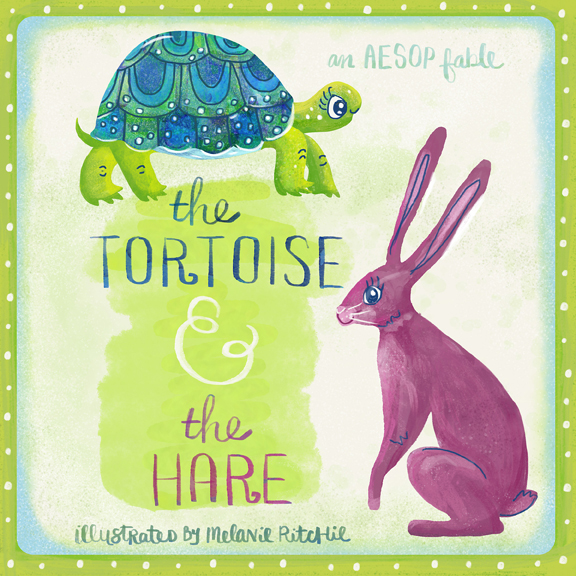
The third week. Oh my! I was initially so excited to learn about illustrating Children’s books. A long time dream! I had some sort of fearful flight response to it. I tried to run as far away as possible from the assignment. I was like my son when telling him it is time for swim lessons. Noooooooooooooooooo!!!! I did not want to do it! Yet I did want something to submit. I didn’t want to miss out on an opportunity to push myself to learn something new. So I sat down the day before the assignment was due and started drawing. I didn’t stop until it was done. It wasn’t as fabulous as I would have liked but that was definitely my own fault. I could have built it up more had I invested more time into it.

MELANIE_RITCHIE_TORTOISE_WK-3

I’m not going to beat myself up for my shortcomings. It is more of an exploration into my process. Why do I resist learning some things? Why do I react this way? What do I enjoy creating? What rituals work for me? What habits do I need to change? All very good stuff if I’m open to finding a better process.

I’m excited to see what next week brings. Hopefully I might even embrace it!

Designing for December

One day in the summer I got asked by the lovely and talented Kelly Sill to create a digital kit for her upcoming Holiday class at Scrapaneers. I said “Heck ya, I’m interested!” and that was the truth.

I’ve been a fan of Kelly for quite some time. She has a style that is all her own. A very clean sleek look to both her digital products and her own scrapbooking. I followed her blog posts to see what new projects she was working on. So, I was pretty happy when she began instructing classes.

Discover December” is going to be packed with oodles of holiday goodness. She will show her students how to create their own 8″x8″ album with the templates, digital kit, word art, glitter styles, and overlays included in the class kit. Seriously, oodles of goodness. I was lucky enough to create the digital kit and was thrilled to find out Karla Dudley was creating matching glitter styles and Taylormade Designs was creating matching word art. Very very cool!

Here’s a peek of the class kit included with enrolment.

DD14_launch-banner-new

Right now the class is on sale until November 10th. Class begins on December 1st. Be sure to check it out!

Never to early for a Cuckoo Christmas

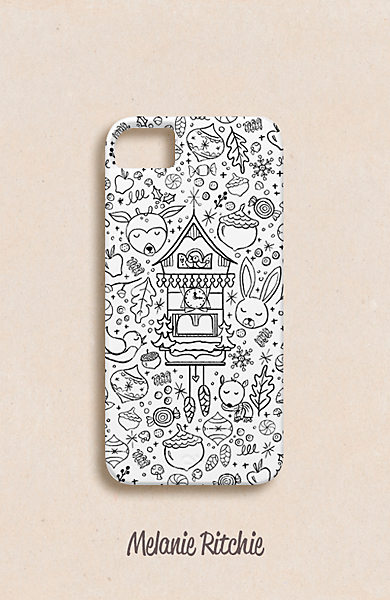
As I mentioned in a previous post, I signed up for Lilla Roger’s Make Art That Sells Assignment Bootcamp which started the beginning of February. We were given the theme of Cuckoo clocks and an assignment to design a phone case. I spent the first week sketching and painting. The second and third week I used Illustrator and Photoshop to turn my sketch into a completed design.

I have to tell you. That first week was an intimidating and humbling process. I tried to remind myself that I needed to focus on just having fun with my art. I think it was when I finally allowed myself to relax that I drew something I liked enough to use for the assignment.

Here is what my design looked like before I added colour. I wanted to see how the design would look on a phone.

melanieritchiemockup

Here is my submission to the gallery:

febMATSbootmockup-lores

I decided to open up a Society6 shop to sell my artwork. Might as well, right? So far I just have the one piece but I hope to fill it with joy soon.

I cannot wait for our March assignment!

Sweet Little Perpetual Calendar

I get a bit nervous when it comes to craft projects. Yeah, I know… you didn’t expect me to say that. I over think things and then think I can’t do it. I need to get over that.

Anyway, several years ago I bought this little wooden perpetual calendar at a dollar store. It had the months and days printed in crooked black text on the wooden blocks. I knew it could be a beautiful calendar when adorned with pretty papers. I just waited for the right supplies to inspire me.

The other day I was browsing the shop at Pixels & Company and I came across Penny Kit (the bundle) by creashens. Isn’t it cute? I added the digital kit and Brushies No.1 (also by creashens) to my cart and got to work!

Image

Now I have a million and one pieces of physical scrapbook paper and products sitting on my craft table but it was the digital scrapbook kit that inspired me (it included awesome papers and washi tapes).

I measured the wooden blocks and in my Photoshop I recreated shapes in the same size. I needed a back and two sides for the calendar holder. I contemplated covering the inside of the holder too but decided I liked the wood. I made 12 squares for the number blocks, and 12 rectangles for the months.

I dragged in the papers I liked and clipped them to the shapes. I used the Anodyne font and used the colour picker tool to select colours to match the papers. Honestly, the hardest part of this whole project was choosing colours that matched AND stood out from the background. Oh, and you only need a 6 OR a 9, not both. See my image below to know which numbers need to be used for this project.

For the rectangles, I clipped in my papers and then added pieces of washi tape. I added my months with the Anodyne font. To make the text stand out more, I used the Brushies No.1 brushes to add a bit of white (usually) background.

Image

I printed my document out on matte Epson presentation paper. I used an exacto knife to cut out the shapes. I applied liberal amounts of double sided tape to the wooden blocks and stuck the paper to the block. I used my exacto knife to trim any paper that went off the edges of the block. Then I lightly sanded the edges. You can omit that step if you like.

That’s it… now I want to see if my local dollar store still has these. I want to make more!

Image

Learning to Dance in the Rain

What a week! I’ve been struggling with a chest cold the past week and a half. Just not a good time. Even got myself to my meditation class on Wednesday. Had to leave after two minutes when I had a fit of coughing. Oh well, at least I tried, right?

For most of the week or so I just didn’t have the energy or focus to do much of anything other than look after my kids. My mind got bit of a break and by Thursday I had all these fabulous ideas in my head. So, yesterday morning my son and I got out the paints. He did his own art thing while I gessoed a canvas.

Nearly a year ago, I repinned an art project I’d seen on Pinterest from Southern Belle Soul, Mountain Bride Heart. It looked pretty fabulous. I believe the artist was inspired by Elsie Larson who did a similar project on her site A Beautiful Mess. Whatever the case, I wanted to try it out.

The thing is, I don’t really follow instructions well. It’s not that I don’t want to. It’s that I decide to do projects on a whim and am not going to trek out to a craft store in search of necessary supplies. I’ll just make do with what I have. So, I did.

Yesterday, I gessoed my canvas. Then I covered the canvas in bits of newspaper and colouring book pages. My daughter had a meltdown when she saw I’d pasted a page from her Strawberry Shortcake colouring book. I felt bad about that. I thought it was a lovely tribute but she felt I was destroying her artwork. Oops. I apologized. Anyway, I *think* she forgives me. I spent the afternoon thinking up what text to put on my artwork. I found something I liked and sketched it out on paper.

wallartblog1

wallartblog2

Someone got a little blue paint all over their face. He was happy.

I didn’t have any vinyl letters like in the tutorials so I thought maybe I could just cut out letters with my Silhouette. After the kids were in bed, I made a design in Illustrator and then imported it into my Silhouette software. I love that I was able to use my own handwriting for the script words.

I also figured out the configuration for my wall art collection. You see, the other day I moved a cabinet to the other side of the room. I decided the wall would be great filled with various pictures and paintings. My husband kindly nodded to my brilliant idea. Wise, very wise. So, last night I put all the pictures on the floor and sketched out where they should go.

This morning, while my son ate his bagel, I cut out the text on my Silhouette. I have the original machine. After 5 1/2 years I’m finally getting some decent use out of it. Of course, now I want the cameo and the designer software.

Then I got out my picture hanging supplies and put up all the pictures. My son was my helper. As in, he watched Handy Manny and answered “Yes!” when I asked if my pictures looked good.

wallartblog3

I went down to the kitchen and mixed some paint with a vague idea of what colour might work on my painting. I had bought adhesive spray years ago and thought I’d adhere the letters to my canvas temporarily with the spray. Um, well, no. The spray would not work. So I dabbed a bit of glue stick and hoped for the best. I very carefully (my haphazard version of careful) dabbed over the letters so the paint wouldn’t get underneath and to create a seal. Then I began to paint the rest of the canvas. That was when my son wanted to help paint. Eeks! I let him. It was ok until he accidentally smudged my “LIFE” letters. Ah well, fixable.  I added a few more layers of paint. Removed the letters. Yay, it worked! Covered with a coat of clear gesso. I let it dry while we got my daughter off her bus. We ate lunch and then I was able to hang up my painting. Now I just have to figure out what to put on the rest of my empty canvases.

wallartblog4

wallartblog5 wallartblog6 wallartblog7

Come back soon and I’ll show you updates of my craft room (tv room/playroom/office/guest bedroom) as I get things in order.

I believed it when I saw it. CanvasPop, you rock!

A couple weeks ago I received my first order from CanvasPop. Moments before the UPS guy knocked on my door, I’d found out one of my photos was highlighted in CanvasPop’s weekly “Curated by Pop” blog post.  That really tickled my toes! I was so impressed with the quality of the prints and the company’s treatment of customers, that I put in a request to add them as an affiliate on my blog. They liked my blog and asked me to write a review on a sample they provided.

Before I go into that process, I’d like to show you how my first order (that I bought before becoming an affiliate) looks on my wall. There were 3 canvases in total.

cpopblog1-4

This is the one that was chosen for photo of the day by CanvasPop. Oh, and I don’t always hang lanterns in my foyer. They were hung for a party and I can’t bear to take them down quite yet.

cpopblog1-3

Here are my other two photos. They might seem like kind of strange places to put up photos but I had these blank spaces on my walls that needed filling. I thought people will see them if I put them in the foyer.

Now, back to my next order. I had heard so much about CanvasPop’s ability to take a low-resolution photo (from Instagram or facebook) and make it look fabulous on canvas. Now THAT is amazing. For those of you wondering what I’m talking about, I’ll put it this way: have you ever printed out a photo that you found on the internet? Chances are it looked good on your screen but looked horrible when printed. It is a matter of resolution and file size. For the computer, things look fine when they are low-resolution (72dpi). For something to look decent on paper, graphics are saved at a high-resolution (usually around 300dpi). CanvasPop claims they can take one of those low-res files and make it all pretty printed out at a much larger size. Say WHAT? I wanted to see this kind of magic in action.

So, I picked an instagram photo. I have 100s to choose from and struggled to pick one. In the end, I chose one of my daughter drying off a toadstool so some fairies could sit on it. Yeah, I know, kinda adorable. I figured if the photo turned out I’ll probably order more Instagram photos so I can fill a wall with maybe 6 or 8 frames.

cpopblog1-2

Today, the canvas arrived. I was exhausted and weary from a long day. This perked me right up! I am so incredibly impressed with the quality. You would never guess this photo would print out so well at 12″x12″. It is very crisp and clear with no blurriness or pixelation. I also like the slight canvas texture that is noticeable if you’re looking at it close up.

It is wrapped with black sides on a 1.5″ thick frame. I haven’t put it up on the wall yet. I think I’m going to wait until I choose more instagram photos to turn into canvas prints. For now I think the canvas fits right in with the whimsy sitting on the top of my china cabinet. Here’s a closer look…

cpopblog1-1

I highly recommend CanvasPop if you’re looking to do a little decorating in your home. Canvas Prints (especially gift certificates) would be an awesome gift (Mother’s Day, Father’s Day, weddings). My biggest advice would be to get at least the 1.5″ thick depth for your canvas. Oh, and check out the Triptych frames they offer… fabulous!

Instagram Photo Frame

I love my instagram photos. I really do. I wondered if there were a way I could show off a whole bunch in a frame in my kitchen. I had this frame I’d purchased before my son was born. I’d intended on making some art on canvas. I did but decided to go with a white frame instead. So, this lovely rustic wooden frame, sitting all lonely in my basement, found its moment.

I printed out oodles of photos I thought I’d like to use. I’d been instagraming for a year and had quite the collection to choose from.

I attached twine across the frame. I used tacks to attach the twine. Not saying  it was the best way. It’s what worked. I was impatient and wanted to accomplish a project for once. So, that’s what I used. I’d intended on using wire but couldn’t attach it easily and liked the more organic look of twine.

Then I used teeny weeny clothespins I’ve had FOREVER to attach the photos. I wanted to use unfinished wood clothespins but the ones I had were slightly too large. I suppose if you used larger instagram photos they might work okay.

That was it. It was THAT easy. If you try this project, leave a link to your photo in my comments. I’d LOVE to see how your project turned out.

Wall art by Melanie Ritchie

My snazzy instagram wall art.

close up - Instagram Wall art by Melanie Ritchie

Close Up – Wall Art by Melanie Ritchie